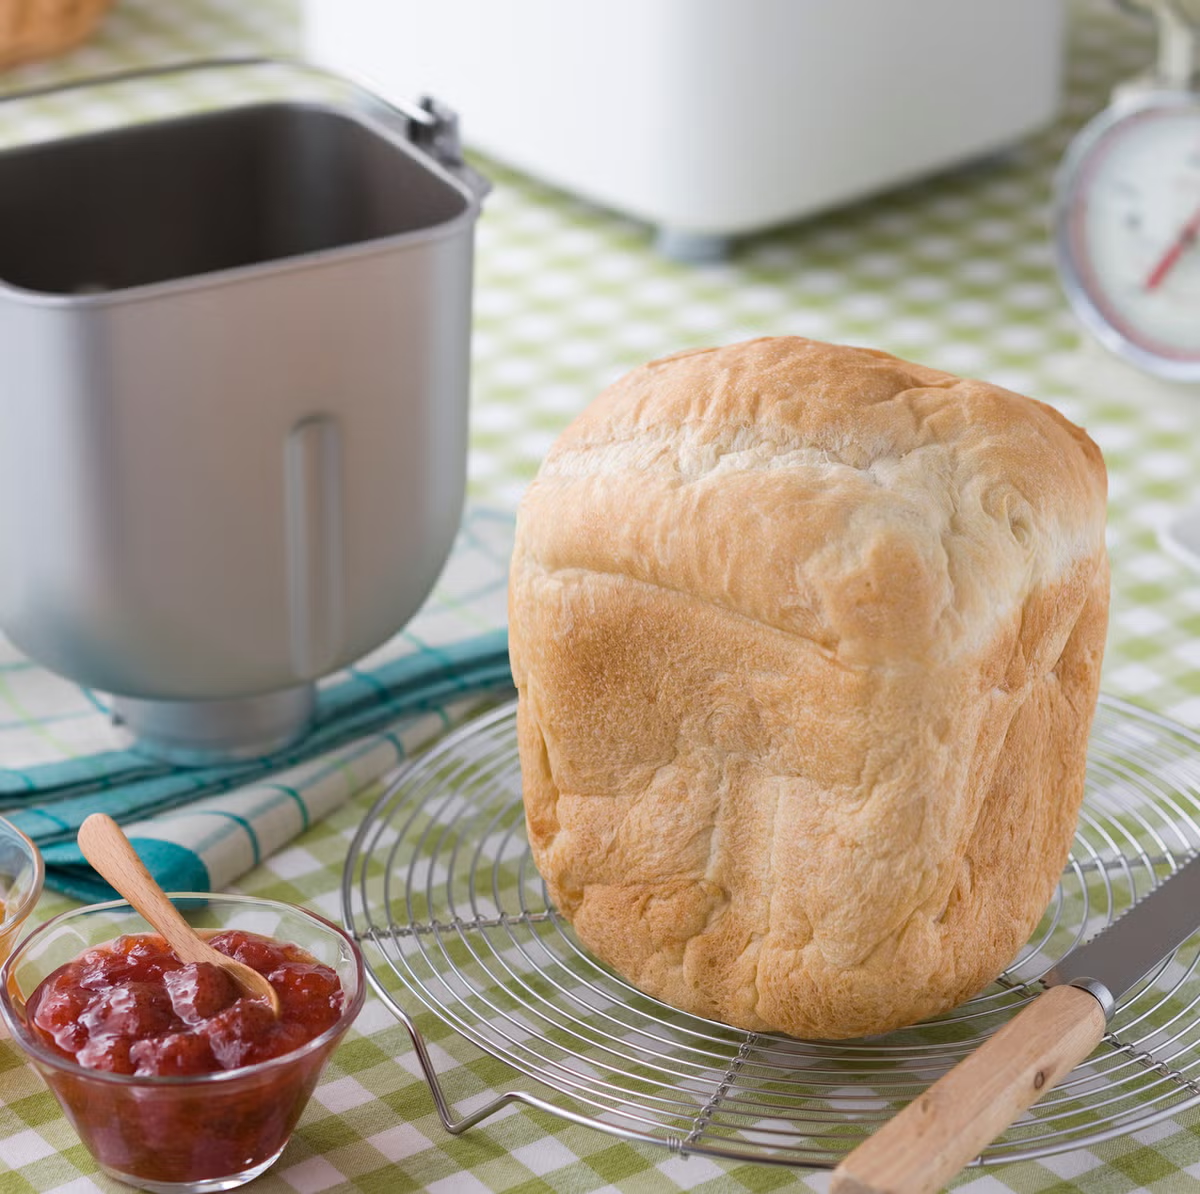
For many home bakers, the allure of freshly baked bread is undeniable. While traditional bread machines offer convenience, the KitchenAid bread maker experience, centered around its versatile stand mixers and innovative accessories, elevates homemade bread to an art form. It’s about more than just baking; it’s about the joy of crafting, the control over ingredients, and the satisfaction of pulling a perfectly golden loaf from your oven, all with the trusted power of KitchenAid.
The Evolution of Home Baking: From Hand Kneading to KitchenAid Innovation
Bread making has a rich history, evolving from arduous hand kneading to the marvels of modern kitchen appliances. For centuries, producing a perfect loaf meant hours of physical labor, developing gluten through sheer muscle power. The introduction of stand mixers revolutionized this process, transforming a strenuous task into an accessible pleasure for home cooks. KitchenAid has been at the forefront of this revolution, providing robust machines that not only tackle the toughest doughs but also inspire culinary creativity. Their stand mixers, often referred to by users as their “bread maker,” have become indispensable tools for countless baking enthusiasts.
The Heart of Your Kitchen: Understanding KitchenAid Stand Mixers for Bread
At its core, the KitchenAid stand mixer acts as your powerful “bread maker” because of its efficient motor and iconic dough hook attachment. This planetary mixing action ensures that every ingredient is thoroughly incorporated and kneaded, developing the gluten necessary for a well-structured, airy loaf.
Tilt-Head vs. Bowl-Lift: Which is Right for Your Bread?
KitchenAid offers various stand mixer models, primarily categorized by their design:
- Tilt-Head Models (e.g., Artisan, Classic): These are popular for their compact size and wide range of colors. They are excellent for most baking tasks, including lighter bread doughs like basic white or challah. However, for very stiff or large batches of dough, some users report that the motors on less powerful models (like the Classic with its 275-watt motor or the Artisan Mini) can struggle or even overheat if pushed too hard. If you’re an occasional bread baker, a 5-quart Artisan can certainly get the job done efficiently.
- Bowl-Lift Models (e.g., Professional, Commercial, Pro Line Series): Featuring more powerful motors (500 watts and up) and larger capacities (6-8 quarts), these models are the workhorses of the KitchenAid lineup. Their bowl-lift design provides extra stability, making them ideal for handling heavy, dense bread doughs like sourdough, rye, or multiple loaves at once. Many serious home bakers prefer these for their reliability and power when frequently making bread.
“Choosing the right KitchenAid mixer for bread isn’t just about capacity, it’s about matching motor power to your baking ambitions. For heavy-duty doughs and frequent baking, a bowl-lift model is often your best friend,” advises expert baker, Chef Eleanor Vance.
The Game-Changing KitchenAid Bread Bowl: An All-in-One Solution
Recently, KitchenAid introduced a true innovation for bread enthusiasts: the KitchenAid Bread Bowl attachment. This ceramic bowl is a game-changer, transforming your stand mixer into an even more comprehensive “bread maker” system.
Features and Design
The KitchenAid Bread Bowl is a sturdy, chip-resistant ceramic bowl designed for ultimate convenience. It features internal measurement marks that help you visualize your dough’s rise, and it comes with a lid that cleverly traps steam during baking, mimicking a traditional steam oven. This attachment is oven-, microwave-, freezer-, and dishwasher-safe, making it incredibly versatile.
Seamless Integration
Designed to attach seamlessly to all 4.5- and 5-quart tilt-head KitchenAid stand mixers, the 5-quart capacity of the Bread Bowl allows you to mix, knead, proof, and even bake your bread all within the same vessel. This means significantly less cleanup and a more streamlined process.
Benefits of the Bread Bowl
The primary advantage of the KitchenAid Bread Bowl is its all-in-one functionality. You start by mixing and kneading your dough directly in the bowl using your stand mixer. Then, you simply leave the dough in the bowl for its first rise (proofing). Once shaped, the dough goes back into the bowl (often inverted onto the lid for baking), and the entire setup goes straight into your oven. The ceramic construction ensures even heat distribution, while the lid helps achieve that coveted golden, crispy crust and a tender crumb, much like a Dutch oven. It truly simplifies the journey from ingredients to a beautifully baked loaf.
Essential Ingredients and Tools for Your KitchenAid Bread Journey
Making bread with your KitchenAid “bread maker” requires a few fundamental ingredients and tools:
Basic Bread Ingredients
- Flour: All-purpose, bread flour, whole wheat, or a blend. Bread flour, with its higher protein content, is often preferred for a chewier texture and better rise. [cite: 3 (recipes)]
- Yeast: Active dry or instant yeast, providing the leavening.
- Water: Lukewarm water (105-115°F or 40-46°C) is ideal to activate yeast without killing it. [cite: 2 (recipes)]
- Salt: Essential for flavor and controlling yeast activity.
- Sugar (optional): Feeds the yeast and adds subtle sweetness and browning.
- Fat (optional): Butter, oil, or lard can enrich the dough, add tenderness, and extend shelf life.
Beyond the Mixer: Key Baking Tools
- Measuring cups and spoons: Accuracy is crucial in baking.
- Rubber spatula or dough scraper: For easily removing dough from the bowl.
- Kitchen scale: For precise ingredient measurement, especially flour.
- Clean kitchen towel or plastic wrap: For covering dough during proofing.
- Loaf pans or baking sheets: If not using the KitchenAid Bread Bowl for baking.
- Wire cooling rack: Essential for cooling your freshly baked bread to prevent sogginess.
Step-by-Step: Crafting Bread with Your KitchenAid
Let’s walk through the general process of making bread using your KitchenAid stand mixer and, optionally, the Bread Bowl.
- Mixing & Kneading:
- Attach your flat beater to the KitchenAid stand mixer and combine dry ingredients (flour, salt, sugar, yeast) and any solid fats. Mix on the lowest speed for a minute or two until combined. [cite: 1 (recipes)]
- With the mixer running, gradually add lukewarm water (and any liquid fats like melted butter or oil). Mix until a shaggy dough forms. [cite: 1 (recipes)]
- Swap the flat beater for the dough hook. Knead on Speed 1 or 2 for 6-8 minutes, or until the dough is smooth, elastic, and passes the “windowpane test” (a small piece of dough stretches thin enough to see light through it without tearing). This efficient kneading develops the gluten, giving your bread its structure. [cite: 1 (recipes), 3 (KA US)]
- First Rise (Proofing):
- Lightly grease the KitchenAid mixing bowl or the Bread Bowl. Place the kneaded dough inside, turning it once to coat.
- Cover the bowl with a damp cloth or plastic wrap (or the Bread Bowl’s lid) and let it rise in a warm, draft-free place until doubled in size, typically 1 to 1.5 hours. If using the Bread Bowl, the internal marks guide you.
- Shaping Your Loaf:
- Gently punch down the risen dough to release air.
- Turn the dough out onto a lightly floured surface. Shape it into your desired form—a classic loaf for a loaf pan, a round boule, or rolls.
- Second Rise & Baking:
- Place your shaped dough in a greased loaf pan, on a baking sheet, or, ideally, into the KitchenAid Bread Bowl (often inverted onto its lid for baking). Cover again for a second rise until nearly doubled, usually 30-60 minutes.
- Preheat your oven to the recipe’s specified temperature (e.g., 350-400°F or 175-200°C).
- Bake until golden brown and hollow-sounding when tapped on the bottom. If using the Bread Bowl, the ceramic and lid will ensure even heating and a fantastic crust.
- Remove from the pan immediately and cool completely on a wire rack before slicing. This allows the internal structure to set properly.
Unleash Your Inner Baker: Tips and Recipe Variations
Your KitchenAid “bread maker” is a gateway to endless baking possibilities.
Mastering the Basics
Start with simple recipes like classic white bread or straightforward whole wheat. These foundational recipes help you understand dough consistency and the timing of rises.
Creative Twists
Once comfortable, experiment with variations:
- Herb and Cheese Breads: Incorporate rosemary, thyme, cheddar, or Parmesan during the last minute of kneading.
- Sweet Breads: Add cinnamon, raisins, dried cranberries, or a touch of honey for delightful breakfast loaves.
- Enriched Doughs: Try brioche or challah, which include eggs and extra butter, for a richer, softer texture. Your KitchenAid mixer excels at these.
Troubleshooting Common Issues
- Sticky Dough: If your dough is too sticky, add flour one tablespoon at a time until it’s manageable but still soft. Humidity can greatly affect flour absorption. [cite: 4 (recipes)]
- Over-proofing: Dough that rises too long can collapse in the oven. Keep an eye on your dough and bake when it’s just doubled.
- Dense Loaf: This can be due to inactive yeast (always proof your yeast first if it’s active dry!), not enough kneading, or improper rising conditions.
The Joy and Benefits of Baking with a KitchenAid Bread Maker
Embracing your KitchenAid as a bread maker brings a wealth of benefits that go beyond just a delicious loaf.
Healthier Choices, Custom Creations
One of the biggest advantages of homemade bread is complete control over ingredients. You can avoid preservatives, artificial flavors, and excessive sugar found in many store-bought options. Tailor your bread to dietary needs—opt for whole grains, reduce salt, or experiment with gluten-free flours (though be aware that gluten-free doughs often require different handling). [cite: 2 (benefits), 3 (benefits)]
Efficiency and Convenience
While not fully automated like a dedicated bread machine, the KitchenAid stand mixer significantly reduces the manual effort of bread making. The dough hook does the heavy kneading, freeing up your hands for other tasks. The Bread Bowl attachment further streamlines the process by consolidating mixing, proofing, and baking into one vessel, cutting down on dishes and steps. [cite: 1, 2, 3 (benefits)]
The Aroma of Home
There’s nothing quite like the comforting scent of freshly baked bread filling your home. It’s a sensory experience that evokes warmth, coziness, and a sense of accomplishment. Sharing a slice of warm, homemade bread with family and friends creates lasting memories and fosters a connection to the simple pleasures of life. [cite: 1 (benefits), 2 (benefits)]
Frequently Asked Questions About KitchenAid Bread Making
Q: Can all KitchenAid mixers handle bread dough?
A: While all KitchenAid stand mixers come with a dough hook, the more powerful bowl-lift models (Professional, Commercial) are best suited for frequent bread making and heavy, stiff doughs. Tilt-head models (Artisan, Classic) can handle lighter doughs and occasional bread baking, but may struggle with large batches or very dense doughs.
Q: How long does it take to make bread with a KitchenAid?
A: The active time for mixing and kneading is usually under 10-15 minutes. The total time, including two rises and baking, can range from 2.5 to 4 hours, depending on the recipe and environmental conditions. [cite: 1 (recipes), 5 (breadit)]
Q: Is the KitchenAid Bread Bowl worth it?
A: For those who frequently make bread and own a compatible tilt-head KitchenAid mixer, the Bread Bowl offers incredible convenience by combining mixing, proofing, and baking into a single, oven-safe ceramic vessel. Its steam-trapping lid helps achieve an excellent crust, making it a valuable investment for serious home bakers.
Q: What’s the difference between a KitchenAid “bread maker” and a stand-alone bread machine?
A: A KitchenAid “bread maker” typically refers to the stand mixer and its accessories, where you manage the process (mixing, kneading, shaping, baking). A stand-alone bread machine is a fully automated appliance that handles all stages from mixing to baking with the push of a button, often resulting in a loaf with a distinct shape and paddle hole. KitchenAid offers more versatility for other baking tasks. [cite: 5 (breadit)]
Q: Can I make gluten-free bread with my KitchenAid?
A: Yes, you can absolutely make gluten-free bread with your KitchenAid stand mixer. Gluten-free doughs often have a different consistency and may require specific recipes and adjustments to achieve optimal results, but the mixer’s power and dough hook are highly effective for mixing these specialized doughs.
The Endless Loaf Ahead
The journey of bread making with a KitchenAid bread maker is one of discovery, flavor, and immense satisfaction. From the robust power of the stand mixer to the ingenious design of the Bread Bowl, KitchenAid provides the tools to transform simple ingredients into extraordinary loaves. So, grab your flour, activate your yeast, and let your KitchenAid guide you. The aroma of your own freshly baked bread is just a few steps away, ready to fill your home and delight your palate. Don’t be shy—experiment, tweak, and share your creations. Happy baking!