There’s a special kind of magic in the aroma of freshly baked bread wafting through your home. It’s comforting, inviting, and for many, a nostalgic journey back to simpler times. But let’s be real, the thought of kneading, proofing, and baking from scratch can feel like a monumental task in our busy lives. This is where the humble Home Bread Maker steps in, transforming what once seemed daunting into an effortless daily delight. It’s not just an appliance; it’s your personal baker, ready to deliver warm, crusty loaves with minimal fuss.
The Evolution of Baking: A Brief History of the Bread Maker
For centuries, bread baking was a labor-intensive process, demanding significant time and skill. From grinding grains to vigorous kneading, it was a true art form passed down through generations. The industrial revolution brought us commercial bakeries, making bread widely accessible. However, the desire for homemade goodness persisted. Enter the home bread maker, first introduced to the market in Japan in the mid-1980s. These early machines were revolutionary, automating the entire process from mixing to baking. Over the decades, they’ve evolved from basic models to sophisticated appliances with a multitude of settings, making it easier than ever to enjoy artisanal-quality bread right in your kitchen. This innovation has democratized bread making, allowing anyone to become a confident baker.
Unpacking Your Home Bread Maker: Types and Key Features
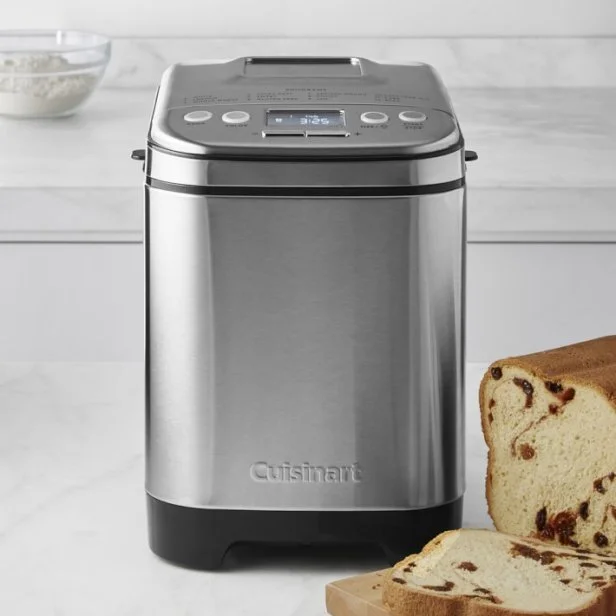
Today’s market offers a fantastic range of home bread maker models, each designed to cater to different needs and preferences. Understanding the types and their key features will help you choose the perfect fit for your culinary adventures.
What are the main types of home bread makers?
The primary distinction often lies in size and the shape of the loaf they produce. Some compact models are ideal for smaller kitchens and yield smaller, often squarer loaves, while larger machines can handle bigger recipes and sometimes produce more traditional rectangular loaves. High-end models frequently feature dual kneading paddles, which are excellent for ensuring a more even mix and better gluten development, leading to a consistently textured crumb.
What key features should I look for in a home bread maker?
- Multiple Settings and Cycles: Beyond basic white bread, look for programs for whole wheat, gluten-free, quick breads, French bread, and even dough-only cycles for pizza or pasta dough. Many advanced home bread maker models also offer settings for jam, cake, and even yogurt.
- Crust Color Control: This feature allows you to choose light, medium, or dark crust preferences.
- Delay Timer: A game-changer! Imagine waking up to the smell of fresh bread. A delay timer lets you add ingredients in the evening and program the machine to start baking hours later.
- Loaf Size Options: Many machines can bake 1-pound, 1.5-pound, or 2-pound loaves, offering flexibility for different household sizes or occasions.
- Automatic Dispensers: Some premium models include dispensers that automatically add ingredients like nuts, seeds, or fruit at the perfect moment during the kneading cycle.
- Viewing Window and Interior Light: While not essential, these can be fun for watching the magic happen!
- Nonstick Baking Pan: Crucial for easy removal of your baked loaf and hassle-free cleanup.
“A good home bread maker isn’t just about baking bread; it’s about simplifying the entire process so you can enjoy fresh, homemade goodness without the fuss. The best models offer versatility and consistent results, letting you experiment with confidence,” advises Chef Anya Sharma, a renowned baking instructor.
Essential Ingredients and Tools for Your Home Bread Maker
One of the beauties of using a home bread maker is the simplicity of the ingredients. You don’t need a pantry full of exotic items to get started.
What are the basic ingredients for bread machine baking?
- Flour: Bread flour is often recommended due to its higher protein content, which leads to better gluten development and a chewier texture. However, many recipes also use all-purpose flour, whole wheat flour, or specialized gluten-free flour blends.
- Yeast: Active dry yeast or instant yeast are commonly used. Ensure your yeast is fresh and not expired for proper rising.
- Liquid: Typically warm water or milk, which helps activate the yeast.
- Sweetener: Sugar, honey, or maple syrup can feed the yeast and add flavor.
- Salt: Essential for flavor and controlling yeast activity.
- Fat: Butter, oil, or shortening adds richness, tenderness, and helps with crust development.
What tools are necessary for using a home bread maker?
While your home bread maker does most of the heavy lifting, a few basic tools will ensure your success:
- Measuring Cups and Spoons: Accurate measurement is key in baking.
- Digital Kitchen Scale: For dry ingredients, a scale offers superior accuracy compared to volume measurements, preventing common issues like dense bread.
- Rubber Spatula: Useful for scraping down the sides of the pan during the initial mixing if needed, or for removing the kneading paddle after the cycle.
- Cooling Rack: Essential for preventing the bottom of your freshly baked loaf from becoming soggy.
Your Step-by-Step Guide to Using a Home Bread Maker
Making bread with a home bread maker is incredibly straightforward. Here’s a general guide to get you started:
- Gather and Measure Ingredients: This is the most critical step. Measure everything precisely. For liquids, use liquid measuring cups; for dry ingredients, a kitchen scale is your best friend.
- Add Ingredients in the Correct Order: Most bread machine manufacturers recommend adding liquids first, followed by dry ingredients, with the yeast added last, often in a small well created in the flour. This prevents the yeast from activating prematurely. Always check your machine’s manual for its specific recommended order.
- Place the Baking Pan into the Machine: Ensure the kneading paddle(s) are correctly inserted into the pan before adding ingredients. Secure the pan in the bread maker.
- Select Your Settings: Choose the appropriate cycle (e.g., “Basic,” “Whole Wheat,” “Dough”), loaf size, and crust color (light, medium, dark).
- Start the Machine: Press the start button and let your home bread maker work its magic. It will typically mix, knead, proof (rise), and bake the bread over several hours.
- Remove and Cool: Once the cycle is complete, carefully remove the hot baking pan from the machine. Invert the pan to release the loaf onto a wire cooling rack. Remove the kneading paddle if it’s stuck inside the loaf.
- Enjoy! Allow the bread to cool for at least 30-60 minutes before slicing. This helps the internal structure set and improves texture.
Elevate Your Loaves: Tips and Recipe Variations with Your Home Bread Maker
A home bread maker is more versatile than you might think. Don’t be afraid to experiment!
What are some common mistakes to avoid for perfect bread?
- Incorrect Ingredient Ratios: This is a common culprit for dense or crumbly bread. Always follow recipes precisely. If your dough is too dry, try adding a tiny bit more liquid; if too wet, a tablespoon of flour.
- Expired Yeast: Old yeast won’t activate properly, leading to a flat loaf.
- Opening the Lid During Proofing: Resist the urge! Maintaining a consistent, warm environment is crucial for a good rise.
- Not Cooling Bread Properly: Slicing hot bread can result in a gummy texture. Patience is a virtue here!
How can I get creative with my home bread maker?
- Herb and Cheese Bread: Add dried herbs (rosemary, thyme, oregano) and shredded cheese to your basic white or whole wheat dough.
- Cinnamon Raisin Bread: A classic breakfast treat! Incorporate cinnamon, raisins, and a touch more sugar.
- Nut and Seed Loaves: Enhance nutrition and texture by adding flax seeds, sunflower seeds, pumpkin seeds, or chopped nuts.
- Sourdough Starter: Some advanced home bread maker models even have a specific setting for cultivating a sourdough starter, opening up a whole new world of tangy, complex flavors.
- Dough-Only Cycle Wonders: Use the dough cycle to prepare dough for homemade pizzas, focaccia, dinner rolls, cinnamon rolls, or even pasta.
The Irresistible Benefits of Making Bread at Home with a Machine
Beyond the delightful aroma, owning a home bread maker brings a host of advantages to your kitchen and lifestyle.
Why is a home bread maker a smart investment?
- Unmatched Convenience: It automates the most time-consuming steps of bread making – kneading and proofing – allowing you to simply add ingredients and walk away.
- Cost-Effective: In the long run, making your own bread is significantly cheaper than buying artisanal loaves or even many supermarket brands, especially if you bake frequently.
- Healthier Options: You control every ingredient. This means no artificial preservatives, fewer unpronounceable additives, and the freedom to use organic flours, whole grains, and reduce sugar or salt content to your preference. This is particularly beneficial for those with dietary restrictions, as gluten-free bread can be easily made.
- Consistent Results: A good home bread maker maintains optimal temperatures for proofing and baking, minimizing variables and increasing your chances of a perfect loaf every time.
- Variety and Customization: Experiment with endless recipes, from sweet to savory, and tailor your bread to your family’s tastes.
Savoring Your Homemade Masterpiece: Enjoying Fresh Bread
The moment of truth arrives when your home bread maker signals that baking is complete. But how do you best enjoy your creation?
What are the best ways to enjoy homemade bread?
- Simply Sliced with Butter: Sometimes, simplicity is perfection. A warm slice with a pat of good quality butter is pure bliss.
- Toasted: Homemade bread makes incredible toast, perfect for breakfast or alongside a hearty soup.
- Sandwiches: Elevate your everyday sandwiches with the superior texture and flavor of homemade bread.
- Bruschetta or Crostini: Slice thinly, toast lightly, and top with fresh ingredients for an appetizer.
- French Toast or Bread Pudding: Stale homemade bread is ideal for these delightful dishes.
Frequently Asked Questions About Home Bread Makers
Curious to learn more? Here are some common questions about using a home bread maker.
How long does it take to make bread in a bread machine?
Most standard bread cycles, including mixing, kneading, proofing, and baking, take approximately 3 to 4 hours, depending on the machine and the specific recipe. Quick bread cycles can be much faster.
Can I make gluten-free bread in a home bread maker?
Absolutely! Many home bread maker models have dedicated gluten-free cycles, which are designed to handle the unique properties of gluten-free flours, often with shorter kneading and longer rising times.
Is it really cheaper to make my own bread?
Yes, generally it is. While the initial investment in a home bread maker exists, the cost of ingredients for a loaf of homemade bread is typically much lower than buying a comparable loaf from a bakery or supermarket. Over time, the savings add up significantly.
What’s the best way to store homemade bread?
Once completely cooled, homemade bread can be stored at room temperature in an airtight container or a bread bag for 2-3 days. For longer storage, slice the bread and freeze it.
My bread came out dense. What did I do wrong?
Dense bread is often caused by too much flour or not enough liquid, expired yeast, or sometimes too much kneading, which can overdevelop the gluten. Ensure precise measurements (using a kitchen scale helps!), check your yeast’s expiry date, and follow the recipe’s liquid-to-dry ratio carefully.
The Final Slice
Bringing a home bread maker into your kitchen is an invitation to a world of culinary delight. It’s an appliance that delivers consistent, delicious results with incredible ease, allowing you to enjoy the unparalleled taste and aroma of freshly baked bread whenever the craving strikes. From classic white loaves to adventurous herb-infused creations, your bread maker is a versatile tool ready to inspire your inner baker. So, why wait? Embrace the warmth, the aroma, and the pure satisfaction of tearing into a loaf made with your own hands, aided by the magic of your home bread maker. Happy baking!