Imagine waking up to the intoxicating aroma of freshly baked bread, a golden crust promising a tender crumb within. For years, this dream felt like a distant fantasy, reserved for seasoned bakers with hours to spare. But with the advent of intelligent kitchen appliances, specifically the Cuisinart Convection Bread Maker, that dream is now an effortless reality for anyone. This incredible machine isn’t just about mixing and baking; it’s about bringing the artisan bakery experience right into your home, effortlessly and consistently.
The Evolution of Bread Making: From Hand to Machine
For centuries, bread making was an arduous, hands-on process, requiring meticulous kneading, patient rising, and precise oven temperatures. While undeniably rewarding, the time commitment made it a special occasion rather than an everyday pleasure. The industrial revolution brought commercial bread production, but with it often came preservatives and a loss of homemade charm. The desire for fresh, wholesome bread at home never truly faded, leading to the innovation of the home bread maker. These early machines offered convenience, but often struggled to replicate the perfect crust and even bake of a traditional oven. This is where the Cuisinart Convection Bread Maker steps in, marrying the best of both worlds with advanced technology.
Why the Cuisinart Convection Bread Maker Stands Out
The Cuisinart Convection Bread Maker, particularly popular models like the CBK-200 and CBK-210, takes home baking to an entirely new level, largely thanks to its distinctive convection technology. What exactly does this mean for your bread? Simply put, a convection fan circulates hot air evenly throughout the baking chamber. This ensures a consistent temperature around your dough, promoting uniform rising and baking, and resulting in that coveted crispy, beautifully golden-brown crust that’s often elusive in standard bread machines.
These machines are loaded with features designed for both novice and experienced bakers. You’ll find up to 16 preprogrammed menu options, covering everything from classic White, Whole Wheat, and French/Italian breads to specialized options like Gluten-Free and Low Carb loaves. Fancy a quick bake? Many models offer “Rapid” cycles for faster results. Want to wake up to warm bread? The 12-hour delay start timer is a game-changer.
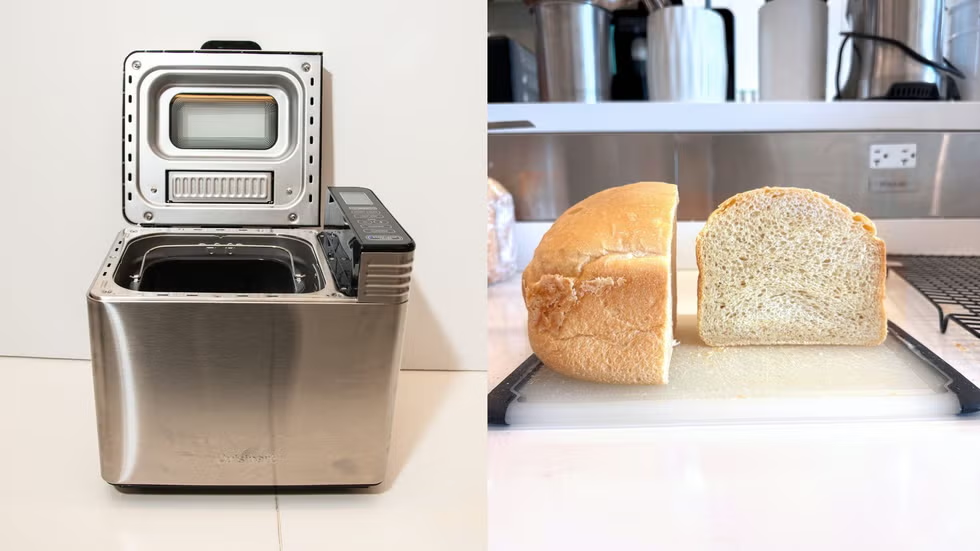
Beyond the programs, customization is key. You can choose from three loaf sizes – 1 lb, 1.5 lb, or 2 lb – to suit your household’s needs, and select your preferred crust shade: Light, Medium, or Dark. Some models also feature an audible tone to signal when it’s the perfect moment to add mix-ins like fruits, nuts, or seeds, ensuring they’re perfectly incorporated into your dough. The sleek, brushed stainless steel design adds a modern touch to any kitchen, and practical elements like a removable lid, removable non-stick bread pan with handles, and a viewing window enhance usability and make cleanup a breeze.
Your Bread-Making Toolkit: Ingredients and Essentials
To embark on your Cuisinart Convection Bread Maker journey, you’ll need just a few basic ingredients and tools. The quality of your ingredients truly makes a difference in the final product.
Basic Ingredients:
- Flour: All-purpose, bread flour, whole wheat flour, or specialty flours like gluten-free blends.
- Yeast: Active dry yeast or instant yeast, always check the expiration date.
- Liquids: Water or milk, ideally lukewarm (around 105-115°F or 40-46°C) for optimal yeast activation.
- Sweetener: Sugar, honey, or maple syrup to feed the yeast and enhance flavor.
- Salt: Essential for flavor and controlling yeast activity.
- Fat: Butter, oil, or shortening for tenderness and richness.
Essential Tools:
- Measuring Cups and Spoons: Accurate measurement is crucial for bread making success.
- Rubber Spatula: Handy for scraping down the sides of the pan during the initial mixing if needed.
- Oven Mitts: Always use these when handling the hot bread pan.
Mastering Your Cuisinart Convection Bread Maker: A Step-by-Step Guide
Using your Cuisinart Convection Bread Maker is surprisingly simple, allowing you to create delicious loaves with minimal effort.
- Prepare the Pan: First things first, ensure your bread pan is clean and dry. Insert the kneading paddle onto the shaft at the bottom of the pan.
- Add Ingredients in Order: This is critical for yeast activation and even mixing. Always add liquids first (water, milk, melted butter/oil), followed by dry ingredients (flour, sugar, salt), and finally, the yeast. Create a small indentation in the center of the dry ingredients and place the yeast there, ensuring it doesn’t touch the liquid or salt initially.
- Place the Bread Pan: Securely insert the bread pan into the baking chamber of your bread maker, pressing firmly until it clicks into place.
- Select Your Program: Power on the machine and use the control panel to choose your desired bread setting (e.g., “White,” “Whole Wheat,” “Gluten-Free”).
- Customize Settings: Adjust the loaf size (1 lb, 1.5 lb, or 2 lb) and crust color (Light, Medium, or Dark) according to your recipe and preference.
- Start Baking: Press the “Start” button. The Cuisinart Convection Bread Maker will now handle everything from kneading and rising to baking. You can monitor the process through the viewing window.
- Post-Baking: Once the cycle finishes and you hear the signal, carefully remove the hot bread pan using oven mitts. Invert the pan to release the loaf onto a wire rack to cool completely before slicing. This cooling process is vital for the bread’s texture.
Beyond the Basic Loaf: Tips, Tricks, and Creative Recipes
Your Cuisinart Convection Bread Maker is a versatile tool that can do much more than just bake a standard loaf.
- Mix-in Magic: Pay attention to the audible tone (or check your manual for the timing) that signals when to add extra ingredients like raisins, chocolate chips, nuts, dried fruits, or herbs. This ensures they’re evenly distributed without being crushed.
- Shape Your Own: Don’t forget the “Dough” cycle! This setting will mix and knead your dough through the first rise. You can then remove the dough, shape it by hand into rolls, pizza crusts, or braided loaves, and bake it in your conventional oven for an artisanal touch.
- Crust Control: For an even crispier crust, some expert bakers suggest lightly brushing the top of the loaf with water during the last few minutes of the “Bake Only” cycle.
- Paddle Perplexity: The kneading paddle will leave a small hole in the bottom of your loaf. If you prefer to avoid this, you can carefully remove the paddle after the last kneading cycle, before the final rise, though this requires you to be present during that specific stage.
“The convection feature in the Cuisinart bread maker isn’t just a gimmick; it genuinely elevates your homemade bread, giving it that professional, evenly browned crust and tender texture that we all crave. It’s a game-changer for consistent results.” – Isabella Rossi, Master Baker and Culinary Educator.
Troubleshooting Common Bread Maker Woes:
- Bread Not Rising: Ensure your yeast is fresh and active, and your liquids are at the correct temperature (not too hot, not too cold). Also, verify you’ve selected the right program.
- Dense Bread: This often indicates too much flour or not enough liquid. Measure precisely and ensure your ingredients are fresh.
- Sticking Loaf: Grease your bread pan thoroughly before adding ingredients. Reducing sweeteners or fats in your recipe can also help.
The Joy of Homemade: Benefits of Machine-Baked Bread
Owning a Cuisinart Convection Bread Maker brings a multitude of benefits that extend far beyond simply having bread on hand:
- Unrivaled Freshness: There’s simply no comparison to the taste and texture of a loaf baked minutes ago.
- Ingredient Control: You decide what goes into your bread, avoiding unwanted preservatives, artificial flavors, and excessive sugars found in many store-bought options. This is especially valuable for those with dietary restrictions, leveraging the low carb or gluten-free settings.
- Cost-Effective: Over time, making your own bread can be significantly cheaper than purchasing loaves from the store or bakery.
- Inviting Aroma: The smell of baking bread fills your home with a comforting, welcoming ambiance.
- Convenience: Despite its artisanal results, the Cuisinart Convection Bread Maker handles all the hard work, freeing you up to do other things while your bread bakes to perfection.
Savoring Your Creation: Enjoying Homemade Bread
Once your Cuisinart Convection Bread Maker has finished its work and your beautiful loaf has cooled, the real fun begins. The possibilities for enjoyment are endless!
- Classic Combinations: A simple slice with butter and jam is a timeless pleasure.
- Versatile Base: Use your homemade bread for gourmet sandwiches, hearty toast, or as a side with soups and stews.
- Creative Pairings: Experiment with savory spreads, cheeses, or even turn day-old bread into delicious croutons or bread pudding.
To keep your homemade bread fresh, store it at room temperature in an airtight container or bread box for 3-5 days. Avoid refrigerating it, as this can dry it out quickly. For longer storage, slice the cooled loaf and freeze the slices, then toast them directly from frozen.
Frequently Asked Questions (FAQ)
Q: What makes the Cuisinart Convection Bread Maker different from a standard bread machine?
A: The key differentiator is the built-in convection fan, which circulates hot air for more even baking, consistent temperatures, and a superior, crispier, and more uniformly browned crust compared to non-convection models.
Q: Can I make gluten-free bread in a Cuisinart Convection Bread Maker?
A: Absolutely! Many Cuisinart Convection Bread Maker models come with dedicated gluten-free settings and recipes, making it easy to bake delicious loaves suitable for those with gluten sensitivities.
Q: How do I prevent the kneading paddle from leaving a hole in my bread?
A: While a small hole is often unavoidable in bread machines, you can minimize it by removing the kneading paddle after the final kneading cycle and before the last rise, which requires being present during that stage of the baking process.
Q: Why is my bread not rising properly in the Cuisinart Convection Bread Maker?
A: Common culprits include inactive or expired yeast, incorrect liquid temperature (too hot or too cold can kill or hinder yeast), or inaccurate measurement of ingredients. Ensure you’re following your recipe and the machine’s instructions precisely.
Q: How do I clean my Cuisinart Convection Bread Maker?
A: The removable bread pan and kneading paddle are often non-stick and dishwasher-safe, or can be easily wiped clean with a damp sponge. The exterior of the machine can be wiped down with a damp cloth. Always unplug the unit and allow it to cool completely before cleaning.
Q: Can I use the delay start timer with perishable ingredients?
A: It’s generally advised to use the delay start timer only with non-perishable ingredients. If your recipe calls for dairy, eggs, or other ingredients that require refrigeration, it’s best to start the baking cycle immediately to prevent spoilage.
Q: How do I get a darker, crispier crust with my Cuisinart Convection Bread Maker?
A: In addition to selecting the “Dark” crust setting, you can use the “Bake Only” function for a few extra minutes at the end of the cycle to achieve an even deeper crust color and crispness.
Your Journey to Perfect Homemade Bread Starts Here
The Cuisinart Convection Bread Maker truly transforms the art of home baking from a complex endeavor into an enjoyable, everyday pleasure. With its advanced convection technology, intuitive settings, and user-friendly design, it empowers you to create loaves with an enviable crust and tender crumb, consistently and with minimal fuss. Embrace the joy of homemade bread, experiment with flavors, and savor the unparalleled freshness that only your Cuisinart Convection Bread Maker can deliver. It’s more than just an appliance; it’s an invitation to a delicious new baking adventure.