There’s a special kind of warmth that fills your kitchen when a fresh loaf of bread is baking, a comforting aroma that store-bought simply can’t replicate. If you’ve been dreaming of that experience and thinking, “I need a Bread Maker Near Me,” you’re in the right place. Owning a bread maker transforms the intimidating process of baking into an effortless culinary adventure, making delicious, wholesome bread accessible right from your countertop. This guide will help you navigate the world of bread makers, from understanding their origins to finding the perfect one conveniently and getting started on your journey to homemade perfection.
The Humble Beginnings: A Brief History of the Bread Maker
Before the era of convenient kitchen gadgets, baking bread was a laborious, time-consuming task, often taking hours of kneading and proofing. The invention of the automatic bread maker revolutionized home baking, making it possible for anyone to enjoy fresh bread with minimal effort. Originally gaining popularity in Japan in the mid-1980s, these machines quickly spread across the globe, bringing the joy of warm, homemade loaves to countless households. Their design, which combines mixing, kneading, rising, and baking into one compact unit, was a game-changer, eliminating much of the mess and manual labor traditionally associated with bread making. From simple devices offering basic white bread to sophisticated models with numerous settings for various doughs and gluten-free options, the bread maker has evolved significantly, continuously adapting to the modern home baker’s needs.
Unpacking the Versatility: Types and Key Features of Bread Makers
When looking for a bread maker near me, you’ll discover a variety of options, each designed to cater to different baking needs and preferences. Understanding these types and their features will help you make an informed choice.
What are the main types of bread makers available today?
Bread makers generally come in vertical or horizontal loaf shapes, with different capacities. Vertical machines are more compact and typically produce taller, narrower loaves, while horizontal models create a more traditional rectangular loaf. Beyond shape, they vary significantly in their programmable features and settings.
- Basic Models: These are excellent for beginners, offering fundamental cycles for white, whole wheat, and dough settings. They focus on simplicity and ease of use.
- Mid-Range Models: Stepping up, these often include additional features like quick bake cycles, jam settings, cake programs, and delay timers, providing more flexibility.
- Advanced Models: High-end bread makers boast a wider array of specialized programs, custom cycle settings, automatic fruit and nut dispensers, and often multiple loaf size and crust darkness options. Some even offer gluten-free specific cycles, which precisely control the kneading and rising times crucial for alternative flours.
What key features should I look for in a bread maker?
Consider these essential features to find a machine that suits your lifestyle:
- Multiple Settings: Look for programs beyond basic bread, such as whole wheat, French, sweet, dough, jam, and gluten-free options.
- Delay Timer: This allows you to add ingredients in the evening and wake up to freshly baked bread in the morning.
- Crust Control: Options for light, medium, or dark crust let you customize your loaf.
- Loaf Size Options: Many machines offer 1-pound, 1.5-pound, and 2-pound loaf settings, perfect for single households or larger families.
- Automatic Dispensers: For ingredients like nuts, seeds, or dried fruit, an automatic dispenser ensures they’re added at the optimal time without manual intervention.
- Keep Warm Function: This can keep your bread warm for up to an hour after baking.
- Viewing Window: A small window allows you to monitor the baking process without opening the lid and disrupting the temperature.
“The best bread maker is one that fits seamlessly into your routine,” says Eleanor Vance, Master Baker and Culinary Educator. “Consider what types of bread you’ll make most often and how much space you have. Sometimes, less is more for a beginner, but advanced features open up a world of creativity.”
The Essentials: Basic Ingredients and Tools
Getting started with your bread maker is surprisingly simple, requiring just a few basic ingredients and no specialized tools beyond the machine itself.
What are the fundamental ingredients for making bread in a bread maker?
You’ll need:
- Flour: All-purpose, bread flour, whole wheat, or specialty flours depending on your recipe. Bread flour, with its higher protein content, yields a chewier loaf.
- Yeast: Active dry yeast or instant yeast are commonly used. Ensure it’s fresh for optimal rise.
- Water or Milk: The liquid component, usually warmed slightly to activate the yeast.
- Sugar: A small amount helps activate the yeast and contributes to crust browning.
- Salt: Essential for flavor and controlling yeast activity.
- Fat (Optional but Recommended): Butter, oil, or shortening adds richness, tenderness, and helps with crust development.
Are there any special tools I need for my bread maker?
Beyond the bread maker itself, you’ll mainly need standard kitchen items:
- Measuring Cups and Spoons: Accurate measurements are crucial for successful bread.
- Rubber Spatula: Useful for scraping down ingredients.
- Cooling Rack: To allow your freshly baked bread to cool evenly and prevent it from becoming soggy.
Your First Loaf: A Step-by-Step Guide to Using a Bread Maker
Making bread with your new machine is wonderfully straightforward. Follow these simple steps for a perfect loaf every time:
- Add Liquids First: Pour all liquid ingredients (water, milk, oil, eggs if using) into the bread maker pan.
- Add Dry Ingredients: Carefully layer the dry ingredients on top of the liquids. This usually means salt, sugar, and flour. Create a small well in the center of the flour for the yeast.
- Add Yeast: Place the yeast directly into the well, ensuring it doesn’t come into direct contact with the liquids or salt initially, as this can hinder activation.
- Select Program: Close the lid, select your desired program (e.g., “Basic,” “Whole Wheat”), loaf size, and crust darkness.
- Start Machine: Press the start button and let your bread maker work its magic!
- Remove and Cool: Once the cycle is complete, carefully remove the hot bread pan from the machine. Invert the pan to release the loaf onto a wire cooling rack.
- Cool Completely: Allow the bread to cool for at least an hour before slicing. This allows the internal structure to set and prevents a gummy texture.
Beyond the Basic: Tips, Tricks, and Recipe Variations
Your bread maker is a versatile tool that can do more than just basic white bread. Experimentation is key to unlocking its full potential!
How can I get the best results from my bread maker?
- Measure Accurately: This cannot be stressed enough. Use proper measuring tools and level your ingredients.
- Use Fresh Ingredients: Especially yeast and flour. Expired yeast is a common culprit for failed loaves.
- Follow Order of Ingredients: Most manufacturers recommend liquids first, then dry ingredients, and yeast last.
- Don’t Open the Lid: Resist the urge during the kneading and rising cycles. Opening the lid can affect temperature and humidity, leading to a collapsed loaf.
- Adjust for Altitude: If you live at a high altitude, you might need to slightly adjust liquid and yeast amounts.
What are some popular bread maker recipes and variations?
The possibilities are endless!
- Herb and Cheese Bread: Add dried herbs (rosemary, thyme, oregano) and shredded cheese during the last kneading cycle (if your machine doesn’t have an auto-dispenser, listen for the beep).
- Cinnamon Raisin Swirl Bread: Incorporate cinnamon and raisins for a sweet breakfast treat.
- Gluten-Free Loaf: Explore specific gluten-free bread mixes or recipes, often using a blend of alternative flours and gums.
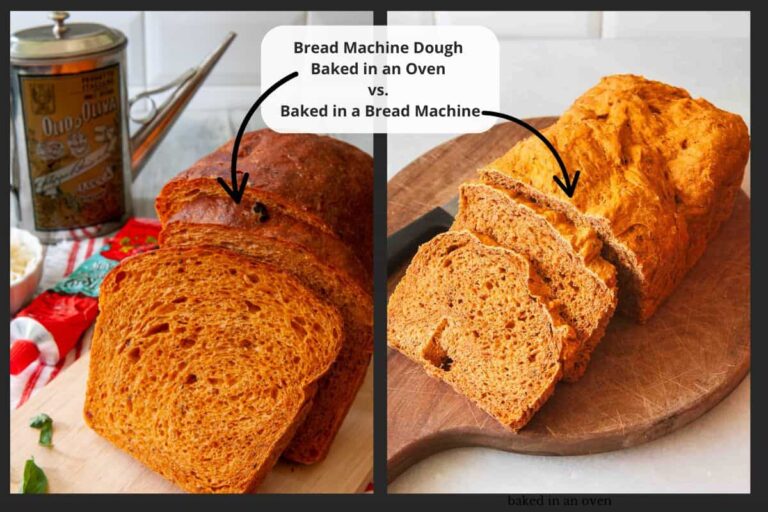
- Dough Cycle for Pizza or Rolls: Use the dough cycle to prepare dough for homemade pizza, cinnamon rolls, dinner rolls, or even pasta, then shape and bake them in your conventional oven.
- Brioche or Challah: Richer doughs with eggs and butter can be made with your bread maker’s sweet bread or dough cycle.
Why Bother? The Wonderful Benefits of Homemade Bread
Beyond the incredible aroma, there are numerous compelling reasons to embrace home bread making with a machine.
What are the key advantages of using a bread maker?
The benefits extend far beyond convenience:
- Control Over Ingredients: You decide what goes into your bread, avoiding preservatives, artificial flavors, and excessive sugar or salt found in many commercial loaves. This is perfect for managing allergies or dietary preferences.
- Cost-Effective: While there’s an initial investment in the machine, making your own bread can be significantly cheaper than buying artisanal loaves regularly.
- Freshness and Taste: Nothing beats the taste and texture of a freshly baked loaf. It’s often superior to store-bought options.
- Reduced Waste: You can bake smaller loaves and only as much as you need, reducing food waste.
- Therapeutic Experience: Many find the process of bread making, even automated, to be incredibly relaxing and rewarding.
- Dietary Freedom: Easily make gluten-free, whole grain, or low-sodium options tailored to your health needs.
Savoring the Moment: Enjoying Your Homemade Bread
You’ve baked it, you’ve cooled it—now for the best part: enjoying your delicious creation.
How should I best enjoy my homemade bread?
The simplest way is often the best:
- Warm with Butter: A classic for a reason! A slice of still-warm bread with a pat of butter is pure bliss.
- With Soup or Stew: Homemade bread is the perfect accompaniment to hearty soups, chili, or stews, soaking up every last drop.
- Sandwiches: Elevate your sandwich game with fresh, flavorful bread.
- Toast: Turn day-old bread into fantastic toast for breakfast or snacks.
- Croutons or Breadcrumbs: If you have any leftover, don’t let it go to waste. Transform it into crispy croutons for salads or fresh breadcrumbs for cooking.
- Pair with Dips: Serve slices with olive oil and balsamic vinegar, or a creamy spinach dip.
Frequently Asked Questions About Bread Makers
Q1: How do I find a bread maker near me?
A1: You can typically find bread makers at major electronics retailers, department stores with kitchenware sections, and specialty kitchen appliance stores. Online retailers also offer quick delivery options that make getting a bread maker almost as convenient as a local purchase.
Q2: Are bread makers difficult to clean?
A2: Most bread maker pans have a non-stick coating, making them relatively easy to clean with warm, soapy water. Avoid abrasive scrubbers to protect the coating.
Q3: Can I make gluten-free bread in any bread maker?
A3: While many modern bread makers have a dedicated gluten-free setting, older or basic models might not. For best results with gluten-free bread, a machine with a specific gluten-free cycle is recommended as it adjusts for the different properties of gluten-free flours.
Q4: How long does it take to bake a loaf of bread in a bread maker?
A4: Most standard bread cycles take between 3 to 4 hours, which includes mixing, kneading, rising, and baking. Quick cycles can significantly reduce this time, often to under 2 hours, though the texture might vary slightly.
Q5: What are the common reasons for bread maker failures?
A5: Common issues include expired yeast, incorrect liquid temperature (too hot or too cold), inaccurate measurements, or opening the lid during the rising cycle. Always double-check your ingredients and follow your machine’s instructions.
Embrace the Joy of Homemade
The journey to consistently delicious, homemade bread starts with a simple step: finding the right bread maker. Whether you’re a seasoned baker looking for more convenience or a complete novice eager to impress your family and friends, a bread maker makes it incredibly easy. Imagine waking up to the smell of fresh bread or effortlessly whipping up a custom loaf for dinner. With the right machine, you control the ingredients, savor the unparalleled taste, and enjoy the countless benefits of baking at home. So go ahead, find that perfect bread maker near me—or simply accessible to you—and start creating your own perfect loaves today!