Imagine waking up to the irresistible aroma of freshly baked bread, golden brown and perfectly crusty, without having lifted a finger beyond adding ingredients the night before. This isn’t a fantasy; it’s the everyday reality for owners of an Automatic Bread Maker. This incredible kitchen appliance has revolutionized home baking, transforming a once time-consuming craft into a simple, hands-off process. If you’ve ever dreamt of enjoying warm, wholesome bread straight from your kitchen with minimal effort, then understanding the magic of an automatic bread maker is your first step to baking bliss.
The Rise of the Automatic Bread Maker: A Brief History
For centuries, making bread was a laborious affair, requiring hours of kneading, rising, and precise oven management. The advent of modern kitchen appliances began to simplify these tasks, but it was the introduction of the automatic bread maker in the late 20th century that truly democratized bread-making. These machines were designed to handle every step—mixing, kneading, proofing, and baking—all within a single unit. Early models were often bulky and limited in functionality, but over the years, technological advancements have led to sleeker designs, a wider array of programs, and more consistent results. Today’s automatic bread makers are sophisticated yet user-friendly, allowing even novice bakers to produce impressive loaves with ease. They represent a culmination of culinary convenience, bridging the gap between traditional baking and contemporary busy lifestyles.
Decoding Your Dough: Types of Automatic Bread Makers and Key Features
Choosing the right automatic bread maker can feel like navigating a bakery full of options. While they all share the core function of simplifying bread creation, different models offer varying features to suit diverse baking needs.
Loaf Shape and Capacity
Automatic bread makers typically come in two main styles: vertical and horizontal.
- Vertical loaf machines are more compact, saving precious countertop space, but produce taller, squarer loaves.
- Horizontal loaf machines yield a more traditional, oblong sandwich loaf shape, though they require a larger footprint.
Loaf capacities also vary, ranging from 1-pound mini loaves perfect for individuals or smaller households, to generous 2-pound or even 2.5-pound loaves ideal for larger families or frequent baking. Many machines offer multiple size options, giving you flexibility.
Pre-Programmed Settings
Modern automatic bread makers are culinary chameleons, boasting a wide array of pre-programmed cycles. These often include:
- Basic White Bread: Your go-to for classic sandwich loaves.
- Whole Wheat Bread: Optimized for denser, whole-grain flours.
- Sweet Bread: Perfect for brioche, challah, or fruit breads.
- French/Italian Bread: Often results in a crispier crust.
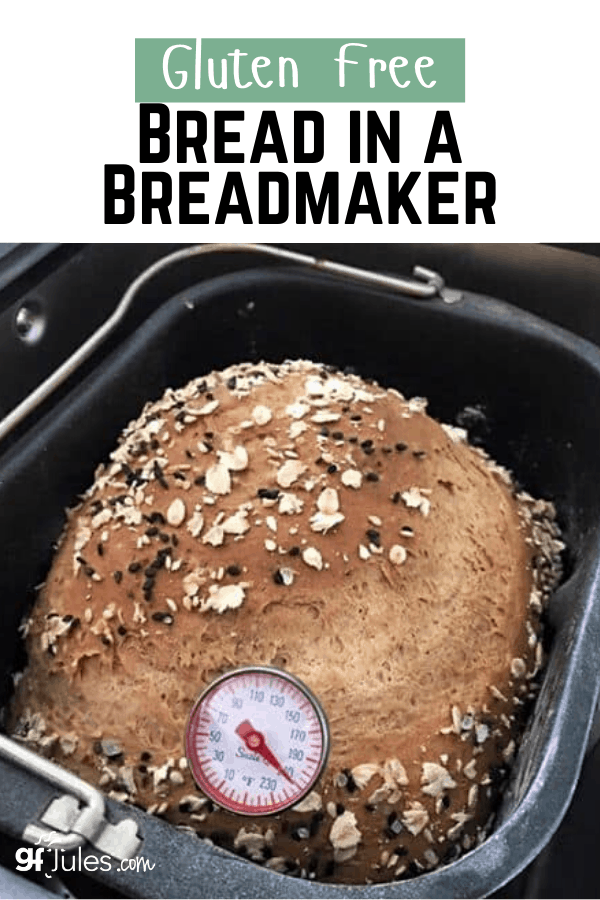
- Gluten-Free: Essential for those with dietary restrictions, with specific kneading and rising times.
- Dough Only: Prepares dough for pizza, pasta, rolls, or bagels, which you can then bake in a conventional oven.
- Jam and Cake: Yes, many models can even whip up homemade jams or bake quick breads and cakes!
- Sourdough Starter: Some advanced machines even offer a setting to ferment sourdough starter.
Customization and Convenience Features
Beyond the basic programs, look for features that enhance your baking experience:
- Crust Color Settings: Choose from light, medium, or dark to achieve your preferred crust.
- Delay Start Timer: A game-changer! Load ingredients up to 15 hours in advance and wake up to fresh bread.
- Keep-Warm Function: Ensures your loaf stays warm for a period after baking.
- Automatic Fruit and Nut Dispenser: This neat feature automatically adds mix-ins like seeds, nuts, or dried fruit at the perfect moment during the kneading cycle, so you don’t have to watch the machine.
- Collapsible Kneading Paddles: Some advanced models have paddles that collapse before baking, preventing the annoying holes at the bottom of your loaf.
Ease of use, with clear LCD displays and intuitive controls, and simple cleanup (often with nonstick, dishwasher-safe pans) are also important considerations when investing in an automatic bread maker.
Essential Ingredients and Tools for Bread Maker Success
Getting started with your automatic bread maker is surprisingly simple, and it all begins with the right ingredients and a few basic tools. The beauty of these machines is their precise control over the environment, but the quality of what you put in directly impacts your delicious outcome.
The Foundation: Flour
- Bread Flour: This is your best friend for an automatic bread maker. It has a higher protein content (typically 12-15%) compared to all-purpose flour, which means more gluten development. Stronger gluten leads to a better rise, a chewier texture, and a lighter loaf.
- All-Purpose Flour: While you can use it, your bread might be denser and not rise as high.
- Whole Wheat Flour: Requires specific settings on your bread maker, as it’s heavier and needs different kneading and rising times.
- Gluten-Free Flours: If you’re going gluten-free, ensure your machine has a dedicated gluten-free setting. These flours behave very differently and often require specific mixes.
The Leavener: Yeast
- Instant Yeast (Bread Machine Yeast/Rapid-Rise Yeast): This is highly recommended for automatic bread makers. It’s designed to dissolve easily and activate quickly, integrating seamlessly into the machine’s timed cycles without needing to be proofed beforehand.
- Active Dry Yeast: Can be used, but it’s often best to proof it in warm liquid first (though some bread makers can handle it directly). Instant yeast offers more reliable results in these machines.
The Supporting Cast
- Liquids: Water, milk, or buttermilk are essential. Ensure they are at the correct temperature (often lukewarm) as specified in your recipe, to activate the yeast properly.
- Sweetener: Sugar, honey, or maple syrup not only add flavor but also feed the yeast, aiding in the rising process.
- Salt: Crucial for flavor and also plays a role in controlling yeast activity and strengthening the gluten structure.
- Fat: Butter, oil, or shortening adds richness, moisture, and helps tenderize the crumb.
Basic Tools
You won’t need much beyond what typically comes with your machine:
- Measuring Cups and Spoons: Precision is key in baking, especially with an automatic bread maker.
- Rubber Spatula: Handy for scraping down the sides if ingredients stick, or removing bread from the pan.
Your First Loaf: A Step-by-Step Guide to Using Your Automatic Bread Maker
Making your first loaf with an automatic bread maker is an exciting and surprisingly simple process. Follow these steps, and you’ll be enjoying warm, homemade bread in no time.
1. Gather and Measure Ingredients Accurately
Precision is paramount in bread making. Ensure all your ingredients are measured correctly. Use liquid measuring cups for liquids and dry measuring cups for dry ingredients, leveling them off.
2. Load Ingredients into the Bread Pan
The order of ingredients is crucial for optimal results:
- Liquids First: Pour water, milk, or any other liquid into the bread pan.
- Then Wet Ingredients: Add eggs, butter (if melted), or oil.
- Dry Ingredients: Carefully layer flour over the liquids, followed by sugar, salt, and any dry milk powder. Try to keep the salt and yeast from touching directly at this stage, as salt can inhibit yeast activity.
- Yeast Last: Create a small indentation in the center of the dry ingredients (don’t let it touch the liquid below) and add the yeast. This ensures the yeast doesn’t activate too early.
3. Place the Pan into the Machine
Securely place the bread pan back into the automatic bread maker unit. Make sure it clicks into place and the kneading paddle(s) are correctly inserted.
4. Select Your Program and Settings
Close the lid and choose the appropriate program from your machine’s menu (e.g., “Basic,” “Whole Wheat,” “Gluten-Free”). Select your desired loaf size and crust color. If you’re using the delay timer, set it now.
5. Start the Machine and Let it Work its Magic
Press the start button. The automatic bread maker will then take over, mixing, kneading, rising, and baking your bread. You’ll hear various sounds as it works—mixing, thumping during kneading, and eventually the quiet hum of baking.
6. Monitor and Add Mix-ins (If Applicable)
If your recipe includes ingredients like nuts, seeds, or dried fruit and your machine doesn’t have an automatic dispenser, listen for an audible beep during the kneading cycle. This signals the perfect time to add your mix-ins.
7. Remove and Cool Your Loaf
Once the baking cycle is complete, the machine will beep. Carefully remove the hot bread pan using oven mitts. Invert the pan onto a wire rack to release the loaf, shaking gently if needed. Immediately remove the kneading paddle(s) if they’re stuck in the bread. Let the bread cool completely on the wire rack for at least 1-2 hours (or even 3 hours for denser loaves). Slicing hot bread can result in a gummy texture.
Beyond Basic Loaves: Tips and Recipe Variations with an Automatic Bread Maker
Your automatic bread maker is capable of so much more than just a basic white loaf! It’s a versatile tool for culinary exploration.
Experiment with Flavors and Textures
Once you’re comfortable with the basics, unleash your creativity:
- Herbs and Spices: Add dried herbs like rosemary, thyme, or oregano for savory breads. Cinnamon and nutmeg are perfect for sweet loaves.
- Cheese: Incorporate grated Parmesan or cheddar for a cheesy delight.
- Vegetables: Sun-dried tomatoes, finely chopped olives, or caramelized onions can add incredible depth.
- Seeds and Grains: Flax seeds, sesame seeds, poppy seeds, or oats can enhance nutrition and texture.
- Liquid Substitutions: Replace water with milk, buttermilk, fruit juice, or even beer for different flavor profiles.
Master the “Dough Only” Cycle
This is where the automatic bread maker truly shines for more complex baking. Use the “Dough” cycle to do all the heavy lifting – mixing and first rise – then manually shape and bake:
- Pizza Dough: A perfect, consistent pizza base every time.
- Dinner Rolls: Shape into individual rolls for a warm accompaniment to any meal.
- Cinnamon Buns: Prepare the dough, roll it out, fill, and bake in your oven.
- Bagels and Pretzels: The dough cycle is ideal for these chewy treats.
Don’t Forget Non-Bread Creations
Many automatic bread makers have specific settings for:
- Jams and Compotes: Transform fresh fruit into delicious spreads with minimal fuss.
- Cakes and Quick Breads: Often uses the “Cake” or “Quick Bread” setting, which usually mixes and bakes without a traditional yeast rise.
- Yogurt: Some advanced models can even incubate homemade yogurt.
Troubleshooting Tips for Perfect Loaves
- Brick-like loaf? Often a sign of insufficient rising. Check your yeast’s expiry date, ensure liquid temperature is correct, and use bread flour for better gluten development.
- Sunken top? Too much liquid or too much yeast can cause the dough to rise too quickly and then collapse.
- Sticking? Always use a nonstick bread pan and ensure it’s clean. A light spray of cooking oil before adding ingredients can help.
- Hole from paddle? If your machine doesn’t have collapsible paddles, you can remove them manually after the final knead cycle (listen for the beep), then gently reshape the dough before the final rise and bake.
“An automatic bread maker isn’t just a convenience; it’s an invitation to explore the vast world of baking with confidence,” says Chef Elena Petrova, a renowned culinary expert. “It handles the technical parts, leaving you free to experiment with flavors and enjoy the creative process without the mess or the guesswork.”
The Irresistible Advantages: Why an Automatic Bread Maker is a Game-Changer
Investing in an automatic bread maker brings a multitude of benefits to your kitchen and lifestyle, making it a truly transformative appliance.
Healthier Eating at Your Fingertips
One of the most compelling reasons to own an automatic bread maker is the unparalleled control it gives you over your ingredients. You can choose organic flours, reduce sugar and salt content, and avoid the preservatives, artificial flavors, and high-fructose corn syrup often found in store-bought loaves. For those with dietary restrictions, it’s a godsend for making fresh gluten-free, whole wheat, or low-carb breads tailored precisely to your needs. This means you know exactly what you’re feeding yourself and your family.
Unmatched Convenience for Busy Lives
The phrase “set it and forget it” perfectly encapsulates the automatic bread maker experience. With a simple addition of ingredients and a press of a button, the machine takes over, handling all the mixing, kneading, rising, and baking. The delay start timer is a particularly brilliant feature, allowing you to load ingredients before bed and wake up to the glorious smell and taste of a freshly baked loaf for breakfast, or to program it to finish just as you get home from work. This hands-off approach saves you valuable time and effort, making homemade bread accessible even on your busiest days.
Significant Cost Savings Over Time
While there’s an initial investment, an automatic bread maker quickly pays for itself. Artisan or specialty breads from bakeries can be quite expensive. The cost of flour, yeast, and other basic ingredients to make a loaf at home is often a fraction of what you’d pay at a store. Over weeks and months, these savings add up, making it a very economical choice for regular bread consumers.
The Therapeutic Experience and Sensory Delight
Beyond the practical benefits, there’s an undeniable joy and satisfaction that comes with baking your own bread. The warm, yeasty aroma that fills your home is incredibly comforting and inviting. Pulling a perfectly golden loaf from your automatic bread maker is a small victory, offering a sense of accomplishment and a deeper connection to your food. It’s a simple pleasure that elevates everyday meals and creates a welcoming atmosphere.
Versatility Beyond Basic Bread
As discussed, these machines are not just single-task ponies. Many automatic bread makers can also prepare dough for pizza, pasta, or rolls, make sweet jams, or even bake cakes and quick breads. This versatility maximizes its utility in your kitchen, making it a multi-functional appliance that can contribute to a wide range of culinary creations.
Savoring the Goodness: Enjoying Your Homemade Bread
You’ve put in the (minimal) effort, and your kitchen smells divine. Now comes the best part: enjoying your freshly baked bread from your automatic bread maker!
The Golden Rule: Cool It Down
Resist the urge to slice into your warm loaf immediately. While tempting, hot bread is still undergoing internal processes; its starches are still gelling. Slicing it too soon can result in a gummy texture and make it difficult to cut cleanly. Let your bread cool on a wire rack for at least 1-2 hours (and up to 3 for larger or denser loaves). This allows the internal moisture to redistribute and the texture to set, resulting in a perfect crumb.
Delicious Ways to Enjoy
Once cooled, your homemade bread is incredibly versatile:
- Simple Pleasures: A slice with a smear of good butter or your favorite jam is often all you need to appreciate its fresh flavor.
- Sandwiches: Elevate your daily lunch with incredibly fresh sandwich bread.
- Toast: Thick slices toasted to perfection, topped with avocado, eggs, or fruit.
- Accompaniment: Serve alongside soups, stews, or salads.
- Croutons: Leftover bread makes fantastic homemade croutons.
- French Toast: Stale bread is ideal for soaking up custardy batter.
Storing Your Homemade Masterpiece
Unlike store-bought bread packed with preservatives, your homemade loaf has a shorter shelf life.
- Room Temperature: Store your bread in an airtight container or a bread box at room temperature for 2-3 days. Avoid the refrigerator, as it can actually make bread go stale faster.
- Freezing: For longer storage, slice the cooled loaf and freeze the slices in an airtight freezer bag. You can then pull out individual slices as needed for toast.
Frequently Asked Questions (FAQ)
Is it worth getting an automatic bread maker?
Absolutely! While not strictly “necessary,” an automatic bread maker offers incredible convenience, health benefits, and long-term cost savings. It simplifies the process of making fresh, homemade bread, allowing you to control ingredients and enjoy a warm loaf with minimal effort.
What type of flour and yeast do you need for a bread maker?
For the best results, use high-protein bread flour, which helps develop strong gluten for a better rise and texture. Instant yeast (also known as bread machine yeast or rapid-rise yeast) is highly recommended as it dissolves easily and activates quickly within the machine’s cycles.
Can you make sourdough bread in an automatic bread machine?
Yes, you can, but with some considerations. Sourdough requires a starter instead of traditional yeast, and its rise times can be unpredictable. Machines with customizable programming are best, allowing you to adjust rise cycles. Some modern machines even have a dedicated sourdough setting or a function to incubate a starter.
Can you make gluten-free bread in an automatic bread machine?
Many automatic bread makers come with a dedicated gluten-free setting, which is crucial for achieving good results with gluten-free flours. Gluten-free flours behave differently than wheat flours, so using a specific setting and a reliable gluten-free recipe designed for bread machines is key.
Why is my bread maker bread so hard or dense?
A hard or dense loaf often indicates insufficient rising. This could be due to expired yeast, incorrect liquid temperature, or using flour with too low a protein content (like all-purpose flour instead of bread flour). Ensuring ingredients are accurately measured and using bread flour can significantly improve texture.
What’s the difference between a bread maker and a bread machine?
There is no difference! The terms “bread maker” and “bread machine” are used interchangeably to refer to the same appliance that automates the bread-making process.
Conclusion
The automatic bread maker stands as a testament to how modern kitchen appliances can enrich our lives, making the comforting tradition of homemade bread accessible to everyone. From its effortless operation to its versatile capabilities, this incredible device truly takes the hard work out of baking. You gain control over ingredients, enjoy significant cost savings, and fill your home with the wholesome aroma of freshly baked goods. So, why not embrace the convenience and joy? Dive into the world of automatic bread making, experiment with flavors, and discover the sheer delight of creating delicious, nutritious bread right in your own kitchen. Your taste buds (and your family) will thank you!