There’s something undeniably magical about the aroma of freshly baked bread filling your home. It’s comforting, inviting, and a simple pleasure that transports you back to simpler times. But let’s be honest, traditional bread-making can feel like a daunting task, laden with precise timings, messy kneading, and the ever-present fear of a deflated loaf. This is where the Neretva bread maker machine steps in, transforming the art of baking into an effortless daily ritual that anyone can master.
Imagine waking up to the smell of a warm, crusty loaf, or effortlessly whipping up a custom-flavored bread for dinner. The Neretva bread maker promises to turn that imagination into your kitchen reality, offering convenience, versatility, and consistently delicious results right at your fingertips.
|
Our Picks for the Best Bread Maker in 2026
As an Amazon Associate I earn from qualifying purchases.
|
||
| Num | Product | Action |
|---|---|---|
| 1 | KBS Pro 710W Bread Maker, 2LB 17-in-1 Automatic Bread Machine with Healthy Ceramic Pan, Nut Dispenser, Tempered Glass Touch Panel, Stainless Steel Housing,3 Crust Colors, 15H Timer&Keep-Warm, Recipe |

|
| 2 | 2LB Bread Maker Machine, OSIPOTO 17 in 1 Automatic Stainless Steel Bread Machine, Non-stick, Beginner-Friendly Controls, 15 Hour Timer, Easy to Clean Low Noise, High Success Rate for Homemade Bread |
|
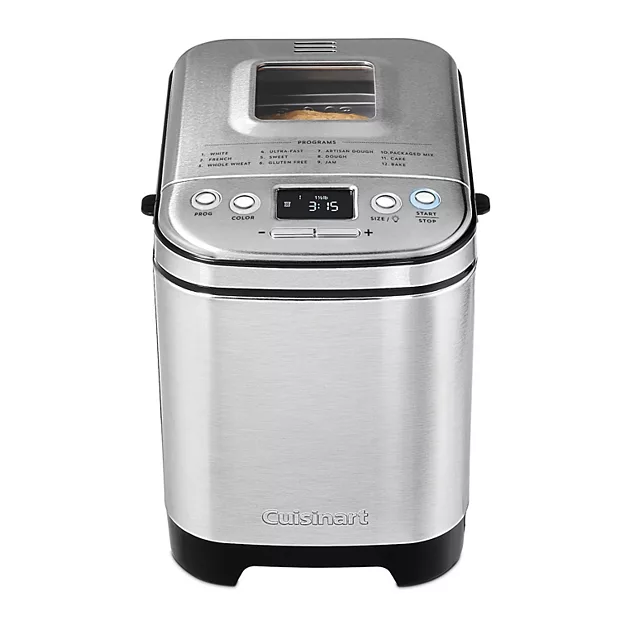
| 3 | Cuisinart Bread Maker Machine, Stainless Steel Automatic Bread Machine with 12 Menu Options, 3 Loaf Sizes up to 2 Lb., 3 Crust Colors, Removable Nonstick Baking Pan & Kneading Paddle, CBK-110NAS |
|
| 4 | Neretva Bread Maker, 20-IN-1 2LB Bread Machine Dual Heater Bread Maker Machine Automatic with Nonstick Ceramic Pan, 15H Timer & 1H Keep Warm Set, Low Noise, Stainless Steel Breadmaker Recipe-Green |
|
| 5 | Elite Gourmet EBM8103M Programmable Bread Maker Machine 3 Loaf Sizes, 19 Menu Functions Gluten Free White Wheat Rye French and more, 2 Lbs, Mint |
|
| 6 | Amazon Basics Programmable Bread Maker, 2 Pound Non-Stick Automatic Bread Making Machine, 14 Settings for Breads, Doughs, Gluten-Free Options and More, LCD Display, White |
|
| 7 | Cuisinart Bread Maker Machine, Stainless Steel Convection Bread Machine with 16 Menu Options, 3 Loaf Sizes Up to 2 Lb., 3 Crust Colors, Includes Measuring Cup, Spoon & Kneading Hook, CBK-210 |
|
| 8 | KITCHENARM 29-in-1 SMART Bread Machine with Gluten Free Setting 2LB 1.5LB 1LB Bread Maker Machine with Homemade Cycle - Stainless Steel Breadmaker with Recipes Whole Wheat Bread Making Machine |
|
| 9 | Rosewill 25-in-1 Automatic Bread Maker Machine with 3 Loaf Size up to 2 Lb, 700W High Power Dual Heater Bread Maker with BPA-free Nonstick Coating Pan, Max 15 Hours Delay Timer, Low Noise - Gray |
|
| 10 | Elite Gourmet EBM8103B Programmable Bread Maker Machine 3 Loaf Sizes, 19 Menu Functions Gluten Free White Wheat Rye French and more, 2 Lbs, Black |
|
The Rise of Home Baking: A Brief History of the Bread Maker
For centuries, bread-making was a laborious, time-consuming process. The advent of the bread maker machine revolutionized home baking, bringing the joy of homemade bread to busy households. These innovative appliances automate the entire process, from kneading and rising to baking, allowing you to simply add ingredients and let the machine do the heavy lifting. The concept has evolved significantly, with modern bread makers like those from Neretva offering advanced programs and user-friendly designs that cater to every kind of baker, from novice to seasoned pro.
Unveiling the Neretva Bread Maker Machine: Features That Bake Perfection
The Neretva bread maker machine isn’t just an appliance; it’s a gateway to a world of culinary creativity and wholesome goodness. These machines are engineered with thoughtful features designed to simplify and enhance your baking journey. Many models boast an impressive array of preset programs, ranging from basic white bread to whole wheat, French, sweet, and even specialized options like gluten-free, sourdough, jam, and yogurt settings. You can customize your loaf further with adjustable crust control, choosing between light, medium, or dark finishes to suit your preference.
One of the standout conveniences is the delay timer, often allowing you to postpone the baking cycle for up to 15 hours. This means you can load ingredients the night before and wake up to the enticing scent of fresh bread. Many Neretva models also include a 1-hour automatic keep-warm function and a handy 20-minute power interruption recovery, ensuring your bread is perfect even if there’s a brief power hiccup. For those who love adding extra flair, some advanced Neretva machines feature an automatic nut and fruit dispenser, which releases ingredients at just the right moment during the kneading cycle, preventing them from being crushed.
The baking pan itself is often a non-stick ceramic (PTFE-free) design, which not only ensures easy cleanup but also offers a healthier, scratch-resistant surface. With quiet motors and sleek designs, Neretva bread makers are built to be both functional and a stylish addition to any kitchen.
Neretva Models at a Glance: Finding Your Perfect Match
Neretva offers a range of bread maker machines, each designed to meet different baking needs and kitchen aesthetics.
- Neretva Retro 2LB Bread Maker: Perfect for singles, couples, or those with smaller kitchens, this compact machine often features a charming retro design. It’s excellent for consistent 1-2 lb loaves and usually comes with around 15 preset programs, making it a fantastic entry point for beginners.
- Neretva 19-in-1 Smart Bread Maker: This model strikes a balance between size and versatility, typically handling up to 2.5 lb loaves. It often includes an automatic nut and fruit dispenser and a smart digital panel, offering more programs (around 19) and features for those ready to experiment.
- Neretva Dual Paddle 3.3LB Bread Maker: Designed for larger families or frequent bakers, this powerhouse can produce commercial-style, horizontal loaves up to 3.3 lbs. Its dual kneading paddles ensure thorough, even mixing, leading to taller, fluffier bread with superior texture. This model often comes with 20+ programs, including options for low-carb and more specialized sourdough recipes.
Gathering Your Toolkit: Essential Ingredients and Supplies
To embark on your homemade bread journey with your Neretva bread maker machine, you’ll need a few basic items. Think of these as your baking essentials:
- Fresh Ingredients: Always start with good quality, fresh ingredients. This includes flour (bread flour is often recommended for better structure, but all-purpose, whole wheat, and gluten-free blends work too), fresh yeast (check expiration dates!), sugar (feeds the yeast), salt (essential for flavor and dough structure), liquid (water or milk), and fats (butter or oil).
- Measuring Tools: Precise measurements are key in bread making. You’ll need an accurate measuring cup for liquids and measuring spoons for smaller ingredients like yeast, salt, and sugar.
- Paddle Removal Tool: Your Neretva bread maker will likely come with a small hook or tool to easily remove the kneading paddle from the baked loaf.
- Heat-Resistant Gloves: These are handy for safely removing the hot bread pan.
Baking Your First Loaf: A Step-by-Step Guide with Neretva
Making bread with your Neretva bread maker machine is surprisingly straightforward. Here’s how to get that delicious loaf going:
- Preparation is Key: First, ensure your bread pan is clean and the kneading paddle(s) are correctly installed at the bottom of the pan.
- Add Ingredients in Order: This is crucial! Generally, you’ll add wet ingredients first (water/milk, oil, eggs), followed by dry ingredients (flour, sugar, salt, any dry milk powder). Finally, create a small well in the flour and add the yeast there, ensuring it doesn’t touch the liquid or salt directly until the kneading begins. This separation prevents premature yeast activation.
- Select Your Settings: Place the pan firmly back into the machine. Use the intuitive control panel and LCD display to choose your desired program (e.g., “Basic Bread”), loaf size (e.g., 2.0 lb), and crust color (light, medium, or dark).
- Press Start: With your selections made, simply press the “Start” button. The Neretva bread maker machine will now take over, mixing, kneading, rising, and baking your bread automatically.
- Monitor (Optional but Recommended): During the initial kneading cycle, you can peek through the viewing window to check the dough consistency. If it looks too dry and crumbly, add a tablespoon of water; if it’s too wet and sticky, add a tablespoon of flour. Do this slowly until the dough forms a soft, cohesive ball.
- Cool Down: Once the baking cycle is complete, the machine will usually beep. Carefully remove the hot bread pan (using your heat-resistant gloves!) and immediately turn the loaf out onto a wire rack to cool completely. This prevents the bottom from becoming soggy. If the kneading paddle is stuck, it’s easier to remove once the bread cools slightly.
- Slice and Enjoy: Once fully cooled (this is important for texture!), slice your bread and savor the incredible taste of homemade goodness.
Beyond Basic Loaves: Tips, Tricks, and Creative Recipes
Your Neretva bread maker machine is a versatile kitchen companion capable of much more than just a basic white loaf.
- Gluten-Free Baking: Many Neretva models excel at gluten-free bread. For best results, use recipes specifically designed for bread machines and their gluten-free settings. As Sarah Jenkins, a seasoned home baker and culinary instructor, often says, “A quality bread maker like the Neretva transforms the seemingly complex art of bread-making into an accessible, joyful daily ritual, especially for those navigating dietary needs like gluten-free baking.” Follow the instructions carefully, often adding wet ingredients first, then dry, and selecting the dedicated gluten-free program.
- Utilizing the Automatic Dispenser: If your model has one, take advantage of the auto-dispenser for nuts, seeds, dried fruits, or chocolate chips. This ensures they are incorporated at the ideal moment without over-mixing.
- Experiment with Flavors: Don’t be shy! Add herbs like rosemary or thyme, grated cheese, olives, or sun-dried tomatoes to your dough for savory variations. For sweet breads, try cinnamon, raisins, orange zest, or a touch of vanilla.
- Dough-Only Function: Many Neretva machines include a “Dough” program. This is fantastic for preparing pizza dough, dinner rolls, focaccia, or even pasta dough. The machine mixes and kneads, then performs the first rise, leaving you with perfectly prepared dough to shape and bake in your conventional oven.
The Sweet Rewards: Benefits of Your Neretva Homemade Bread
Owning a Neretva bread maker machine brings a myriad of advantages to your kitchen and lifestyle:
- Unmatched Freshness: There’s simply no comparison to the taste and texture of bread baked just hours, or even minutes, ago.
- Ingredient Control: You decide exactly what goes into your bread, avoiding preservatives, artificial flavors, and excessive sugars often found in store-bought loaves. This is a huge win for healthier eating.
- Cost-Effectiveness: Over time, making your own bread can be significantly cheaper than buying artisanal or specialty loaves from the store.
- Effortless Convenience: The machine does all the hard work, freeing up your time while still delivering delicious results.
- Aromatherapy for Your Home: The warm, yeasty scent of baking bread is an instant mood booster and makes your home feel incredibly welcoming.
Serving Up Happiness: Enjoying Your Homemade Creations
Once your Neretva bread maker machine has delivered a warm, fragrant loaf, the possibilities for enjoyment are endless. Serve a hearty slice with butter and jam for breakfast, use it to craft gourmet sandwiches for lunch, or as an accompaniment to a warming soup or stew for dinner. Homemade bread also makes fantastic toast, croutons, or even bread pudding. For optimal freshness, store your cooled bread in an airtight container or bread bag at room temperature for a few days, or slice and freeze for longer preservation.
Troubleshooting Common Bread Maker Hiccups
Even with a reliable Neretva bread maker machine, occasional baking anomalies can occur. Don’t worry, most problems have simple solutions.
Why didn’t my bread rise?
This is a common issue. Check if your yeast is fresh and not expired. [cite: 1, 2, 3 (troubleshooting results)] Also, ensure your liquid isn’t too hot (which kills yeast) or too cold (which inhibits it). [cite: 1, 5 (troubleshooting results)] Too much salt can also hinder yeast activity. [cite: 1, 2 (troubleshooting results)]
Why is my bread dense or collapsed?
A dense loaf can result from too much flour, not enough liquid, or insufficient kneading. [cite: 1 (troubleshooting results)] Conversely, a collapsed loaf often happens when there’s too much yeast or sugar, or not enough salt, causing the bread to rise too quickly and then fall. [cite: 1, 2, 4 (troubleshooting results)] Opening the lid during baking or warm, humid weather can also cause collapse. [cite: 3, 2 (troubleshooting results)]
What to do about a gummy center?
If your bread has an uncooked or gummy texture, it might be underbaked. [cite: 2, 3 (troubleshooting results)] Try using a darker crust setting or a slightly longer bake cycle if your machine allows. Ensure your bread pan is the appropriate size for your recipe, allowing heat to penetrate evenly. [cite: 2 (troubleshooting results)]
Frequently Asked Questions About the Neretva Bread Maker Machine
Can I use any recipe in my Neretva bread maker?
While many recipes can be adapted, it’s generally best to start with recipes specifically designed for bread machines. These recipes are balanced for the machine’s specific kneading, rising, and baking cycles.
How do I clean my Neretva bread pan?
Most Neretva bread pans are non-stick ceramic and can be easily cleaned with warm, soapy water and a soft sponge. Avoid abrasive scrubbers or harsh chemicals to protect the non-stick coating. The kneading paddle(s) and measuring tools are often machine-washable.
Is the Neretva bread maker good for gluten-free bread?
Yes, many users rave about the Neretva bread maker’s performance with gluten-free recipes, often having dedicated gluten-free settings that yield excellent results.
What’s the difference between single and dual paddles?
A single paddle is standard and works well for most loaves. Dual paddles, found in larger Neretva models like the 3.3LB, offer more thorough and even kneading, which can lead to a better rise and texture, especially for larger or denser doughs.
How long does it take to make a loaf?
Baking time varies depending on the program and loaf size selected. A basic white bread loaf typically takes around 3 to 4 hours from start to finish. Quick bread settings can shorten this, while specialized programs might take longer.
Bake Your Best with Neretva
The Neretva bread maker machine is more than just an appliance; it’s an invitation to rediscover the simple, profound joy of homemade bread. From its user-friendly interface and diverse programs to its thoughtful design and reliable performance, it equips you to create delicious, wholesome loaves with minimal effort. Whether you’re a beginner eager to try your hand at baking or an experienced pro looking for convenience, the Neretva bread maker machine stands ready to transform your kitchen into a haven of warmth and wonderful aromas. So go ahead, choose your model, gather your ingredients, and let the magic of fresh bread begin.