Imagine waking up to the irresistible aroma of freshly baked bread, golden brown and perfectly warm, without having lifted a finger beyond adding ingredients the night before. This dream is a daily reality for owners of the best at home bread maker. These kitchen workhorses have revolutionized how we enjoy wholesome, delicious bread, making the ancient art of bread-making incredibly accessible for everyone. If you’re ready to ditch the store-bought loaves and embrace the simple joy of homemade goodness, let’s explore what makes a bread maker truly exceptional for your kitchen.
Bread makers have come a long way from their early iterations. What began as simple machines designed to mix and bake a basic loaf has evolved into sophisticated appliances that handle everything from complex doughs to jams and even yogurt. The essence of their innovation lies in automating the entire bread-making process: mixing, kneading, proofing (rising), and baking, all within a single, convenient appliance. This automation liberates you from the labor-intensive steps of traditional baking, offering consistency and convenience that were once unimaginable.
|
Our Picks for the Best Bread Maker in 2026
As an Amazon Associate I earn from qualifying purchases.
|
||
| Num | Product | Action |
|---|---|---|
| 1 | Amazon Basics Programmable Bread Maker, 2 Pound Non-Stick Automatic Bread Making Machine, 14 Settings for Breads, Doughs, Gluten-Free Options and More, LCD Display, White |

|
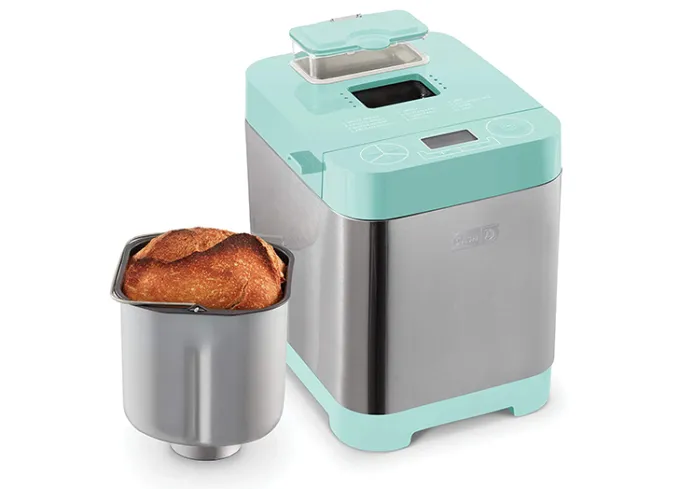
| 2 | Elite Gourmet EBM8103M Programmable Bread Maker Machine 3 Loaf Sizes, 19 Menu Functions Gluten Free White Wheat Rye French and more, 2 Lbs, Mint |
|
| 3 | Neretva Bread Maker, 20-IN-1 2LB Bread Machine Dual Heater Bread Maker Machine Automatic with Nonstick Ceramic Pan, 15H Timer & 1H Keep Warm Set, Low Noise, Stainless Steel Breadmaker Recipe-Green |
|
| 4 | KBS Pro 710W Bread Maker, 2LB 17-in-1 Automatic Bread Machine with Healthy Ceramic Pan, Nut Dispenser, Tempered Glass Touch Panel, Stainless Steel Housing,3 Crust Colors, 15H Timer&Keep-Warm, Recipe |
|
| 5 | KITCHENARM 29-in-1 SMART Bread Machine with Gluten Free Setting 2LB 1.5LB 1LB Bread Maker Machine with Homemade Cycle - Stainless Steel Breadmaker with Recipes Whole Wheat Bread Making Machine |
|
| 6 | 2LB Bread Maker Machine, OSIPOTO 17 in 1 Automatic Stainless Steel Bread Machine, Non-stick, Beginner-Friendly Controls, 15 Hour Timer, Easy to Clean Low Noise, High Success Rate for Homemade Bread |
|
| 7 | Cuisinart Bread Maker Machine, Stainless Steel Automatic Bread Machine with 12 Menu Options, 3 Loaf Sizes up to 2 Lb., 3 Crust Colors, Removable Nonstick Baking Pan & Kneading Paddle, CBK-110NAS |
|
| 8 | Elite Gourmet EBM8103B Programmable Bread Maker Machine 3 Loaf Sizes, 19 Menu Functions Gluten Free White Wheat Rye French and more, 2 Lbs, Black |
|
| 9 | Rosewill 25-in-1 Automatic Bread Maker Machine with 3 Loaf Size up to 2 Lb, 700W High Power Dual Heater Bread Maker with BPA-free Nonstick Coating Pan, Max 15 Hours Delay Timer, Low Noise - Gray |
|
| 10 | Cuisinart Bread Maker Machine, Stainless Steel Convection Bread Machine with 16 Menu Options, 3 Loaf Sizes Up to 2 Lb., 3 Crust Colors, Includes Measuring Cup, Spoon & Kneading Hook, CBK-210 |
|
Unveiling the Features of a Top-Tier Home Bread Maker
When you’re searching for the best at home bread maker, you’re looking for more than just a gadget; you’re investing in a culinary companion. Modern bread machines offer a spectrum of features designed to cater to every baking whim and dietary need.
Loaf Size and Shape Versatility
One of the first things you’ll notice about bread makers is their capacity and the shape of the resulting loaf. Many machines offer adjustable loaf sizes, commonly ranging from 1, 1.5, to 2 pounds, making it easy to bake just enough for a single person or a family feast. While some models produce tall, vertical loaves, premium bread makers often feature horizontal pans that yield a more traditional, sandwich-friendly rectangular shape, much like what you’d find at your favorite bakery. The Zojirushi Home Bakery Virtuoso Plus, for instance, is frequently lauded for its ability to produce perfectly shaped 2-pound loaves ideal for slicing.
Diverse Baking Programs
The heart of any great bread maker lies in its pre-programmed settings. The best at home bread maker will come equipped with a wide array of cycles, moving far beyond just “basic white.” You’ll typically find programs for:
- Whole Wheat: Optimized for denser, nutrient-rich flours.
- French/Italian: Creating loaves with a crispy crust and airy interior.
- Sweet Bread: Perfect for cinnamon rolls, brioche, or challah.
- Gluten-Free: Essential for those with dietary restrictions, these cycles often have specific kneading and rising times crucial for gluten-free flours.
- Quick Bake: For when you need a loaf in a hurry.
- Dough Cycle: This allows the machine to mix and knead, then you can remove the dough to shape and bake in a conventional oven, or create pizzas, pasta, or rolls.
- Jam, Cake, and Yogurt: Many versatile models include non-bread functions, transforming them into multi-purpose kitchen appliances.
These varied settings ensure that your bread maker isn’t just a one-trick pony, but a versatile tool for countless culinary creations.
Advanced Features for the Discerning Baker
Beyond the core programs, several advanced features elevate the experience:
- Crust Color Control: Choose from light, medium, or dark crusts to suit your preference.
- Delay Timer: This is a game-changer. Load your ingredients before bed or work, set the timer, and wake up or come home to a fresh, warm loaf.
- Automatic Dispensers: Some models include compartments that automatically add nuts, seeds, dried fruits, or yeast at precisely the right moment in the cycle, ensuring even distribution without you having to intervene.
- Dual Kneading Paddles: Often found in higher-end models, two paddles provide superior kneading, especially for larger loaves, resulting in a more consistent dough and crumb.
- Viewing Window and Interior Light: Keep an eye on your dough’s progress without opening the lid and disrupting the temperature.
- Collapsible Paddles: A clever design that drops down before baking to minimize the hole left in the bottom of the finished loaf.
“The true magic of a modern bread maker lies not just in its automation, but in its ability to empower home bakers,” notes Dr. Elara Vance, a renowned Food Science Innovator. “It transforms what was once a time-consuming craft into an accessible daily pleasure, allowing you to enjoy wholesome, preservative-free bread with minimal effort.”
The Essentials: Ingredients and Tools for Bread Making
Starting your bread-making journey with a machine is surprisingly simple. You’ll need just a few basic ingredients and measuring tools.
Core Ingredients
- Flour: Strong bread flour is usually preferred for most yeast breads, offering the gluten structure needed for a good rise. Whole wheat, rye, or specialized gluten-free flour blends are used for specific recipes.
- Yeast: Active dry or instant yeast is typically used. Ensure it’s fresh for optimal results.
- Water (or Milk/Buttermilk): The liquid component, crucial for activating the yeast and forming the dough.
- Salt: Essential for flavor and controlling yeast activity.
- Sugar (or Honey/Maple Syrup): Feeds the yeast and adds subtle sweetness.
- Fat (Oil/Butter): Adds tenderness and richness to the crumb.
Essential Tools
- Measuring Cups and Spoons: Precision is key in bread making. Accurate measurements ensure your recipe turns out perfectly.
- Rubber Spatula: Handy for scraping down the sides of the pan if any ingredients stick during mixing.
Your First Loaf: A Step-by-Step Guide to Using Your Bread Maker
Using a bread maker is wonderfully straightforward. Follow these simple steps for a perfect loaf every time:
- Insert the Pan and Paddles: Ensure the bread pan is securely in place and the kneading paddle(s) are correctly attached at the bottom.
- Add Liquid Ingredients: Pour in water, milk, or other liquids first.
- Add Dry Ingredients: Spoon in flour, sugar, salt, and any other dry components.
- Add Yeast: Create a small indentation in the center of the flour (away from salt and liquids) and add your yeast. Keeping salt and yeast separate initially prevents the salt from inhibiting yeast activity.
- Select Your Cycle: Choose the appropriate program for your recipe (e.g., “Basic White,” “Whole Wheat,” “Gluten-Free”).
- Select Loaf Size and Crust Color: Adjust these settings if your machine offers them.
- Press Start: The machine will begin its automated cycle of mixing, kneading, rising, and baking.
- Cool Your Loaf: Once the cycle is complete, carefully remove the hot bread pan. Invert the pan to release the loaf onto a wire rack. It’s crucial to let the bread cool completely on a rack to prevent the bottom from becoming soggy, which ensures a crisp crust and ideal texture.
Elevate Your Baking: Tips and Recipe Variations
The journey with your bread maker doesn’t end with a basic loaf. Here are some tips and ideas to expand your repertoire:
- Precision is Paramount: Always measure ingredients carefully, especially flour and liquids, as even small variations can affect the dough’s consistency.
- Ingredient Order Matters: Most bread makers require liquids first, then dry ingredients, with yeast added last and separated from salt. Always refer to your machine’s manual and recipe for the precise order.
- Experiment with Flours: Venture beyond standard all-purpose. Try using ancient wheat varieties like spelt or einkorn, or explore various gluten-free flour blends to find new favorite textures and flavors.
- Flavor Boosters: Add herbs, cheese, sun-dried tomatoes, olives, or spices to your dough for savory variations. For sweet loaves, incorporate chocolate chips, nuts, or citrus zest. If your machine has an automatic dispenser, these additions will be perfectly integrated.
- Beyond the Loaf: Use the dough cycle to prepare dough for homemade pizza, focaccia, dinner rolls, or even pasta. Many machines can also make delectable jams, cakes, and rich, creamy yogurt.
The Rewarding Benefits of Homemade Bread with a Machine
Owning the best at home bread maker brings a multitude of advantages that go beyond simply having fresh bread.
Uncompromised Freshness and Flavor
There’s truly nothing like the taste and aroma of bread baked minutes ago. Homemade bread is free from the preservatives and artificial flavors often found in store-bought options, resulting in a cleaner, more authentic taste. You can enjoy the bread at its peak freshness, still warm from the machine.
Complete Control Over Ingredients
With a bread maker, you decide exactly what goes into your family’s food. This is invaluable for managing dietary needs such as gluten intolerance, allergies, or simply avoiding unwanted additives. You can opt for organic ingredients, reduce sugar, or add fiber-rich grains, tailoring each loaf to your exact specifications.
Time-Saving and Effortless
While the baking cycle itself takes a few hours, your active participation is minimal. You simply add the ingredients, press a few buttons, and let the machine do the rest. This “hands-off” approach is perfect for busy individuals or those who find traditional kneading tiresome, such as people with arthritis or limited mobility. It also keeps your kitchen cleaner, as all the mixing and kneading happens within the enclosed pan.
Cost-Effective Goodness
Regularly purchasing artisan or specialty breads can add up. Making your own bread with a machine is often significantly more economical, especially if you bake frequently. The initial investment in a bread maker quickly pays for itself through savings on groceries.
A Healthier Lifestyle Choice
Homemade bread allows for healthier choices. You can easily incorporate whole grains, seeds, and nuts, boosting nutritional content. For those needing gluten-free options, homemade gluten-free bread is not only fresher but often more affordable than pre-made alternatives, which can also suffer from texture issues.
Savoring Your Handiwork: Enjoying Homemade Bread
Once your bread maker has worked its magic, the best part begins: enjoying your delicious creation.
- Classic Sandwiches: Slice your fresh loaf for the ultimate sandwich experience. The soft interior and firm crust provide a perfect base for any filling.
- Warm Toast: A slice of homemade bread, lightly toasted and slathered with butter or your favorite jam (perhaps even homemade jam from your bread maker!), is an unbeatable breakfast or snack.
- Accompaniment to Meals: Serve slices of rustic whole wheat or savory herb bread alongside soups, stews, or salads. It’s perfect for dipping into olive oil and balsamic vinegar.
- Creative Dishes: Day-old bread can be transformed into croutons, bread pudding, or French toast. Don’t let a single crumb go to waste!
Frequently Asked Questions About Home Bread Makers
Q: Is a bread maker really worth the investment?
A: Absolutely! A bread maker saves time and effort, offers complete control over ingredients for healthier eating, and is cost-effective in the long run compared to buying specialty breads regularly. The sheer convenience and freshness are unparalleled.
Q: Can I make gluten-free bread in any bread maker?
A: While many modern bread makers include a dedicated “Gluten-Free” cycle, it’s essential to check the machine’s specifications. Gluten-free flours require specific mixing and rising times, so a dedicated program ensures the best results.
Q: What’s the difference between one and two kneading paddles?
A: Bread makers with two kneading paddles, often found in larger models like the Zojirushi Virtuoso Plus, generally provide more thorough and even kneading, especially for bigger loaves. This can lead to a more consistent dough texture and a better rise.
Q: Why does my bread have a paddle hole at the bottom?
A: The kneading paddle(s) remain in the pan during baking, inevitably leaving a small indentation or hole at the bottom of the loaf. Some advanced machines feature collapsible paddles that drop down during the bake cycle to minimize this.
Q: Can I use my bread maker just for dough and bake it in the oven?
A: Yes! Most bread makers have a “Dough” cycle that mixes and kneads the dough, and allows it to rise, but stops before baking. You can then remove the dough, shape it as desired (for rolls, pizza, or a rustic free-form loaf), and bake it in your conventional oven.
Q: How do I clean my bread maker?
A: Typically, the bread pan and kneading paddle(s) have a non-stick coating and should be hand-washed with warm, soapy water to preserve the coating. The interior and exterior of the machine can be wiped clean with a damp cloth. Always refer to your specific model’s manual for cleaning instructions.
Embrace the Joy of Homemade Bread
Investing in the best at home bread maker is more than just buying an appliance; it’s opening the door to a world of fresh flavors, healthier choices, and the comforting ritual of homemade goodness. From the satisfying thrum of the machine kneading dough to the warm, yeasty scent filling your kitchen, the experience is delightful. Whether you’re a seasoned baker looking for convenience or a novice eager to try your hand at fresh bread, a quality bread maker empowers you to create delicious, wholesome loaves with remarkable ease. So, choose your machine, gather your ingredients, and prepare to be amazed by the simple magic of homemade bread.