Ever walked past a bakery and been utterly captivated by the warm, inviting aroma of freshly baked bread? What if I told you that same delightful scent, and even better, the taste of a perfectly crafted loaf, could be a regular occurrence right in your own kitchen? That’s the magic of a bread maker machine, a kitchen companion that transforms basic ingredients into artisanal loaves with surprising ease. This isn’t just about convenience; it’s about reclaiming the joy and satisfaction of homemade goodness without the fuss.
|
Our Picks for the Best Bread Maker in 2026
As an Amazon Associate I earn from qualifying purchases.
|
||
| Num | Product | Action |
|---|---|---|
| 1 | Elite Gourmet EBM8103M Programmable Bread Maker Machine 3 Loaf Sizes, 19 Menu Functions Gluten Free White Wheat Rye French and more, 2 Lbs, Mint |

|
| 2 | KBS Pro 710W Bread Maker, 2LB 17-in-1 Automatic Bread Machine with Healthy Ceramic Pan, Nut Dispenser, Tempered Glass Touch Panel, Stainless Steel Housing,3 Crust Colors, 15H Timer&Keep-Warm, Recipe |
|
| 3 | Elite Gourmet EBM8103B Programmable Bread Maker Machine 3 Loaf Sizes, 19 Menu Functions Gluten Free White Wheat Rye French and more, 2 Lbs, Black |
|
| 4 | KITCHENARM 29-in-1 SMART Bread Machine with Gluten Free Setting 2LB 1.5LB 1LB Bread Maker Machine with Homemade Cycle - Stainless Steel Breadmaker with Recipes Whole Wheat Bread Making Machine |
|
| 5 | Neretva Bread Maker, 20-IN-1 2LB Bread Machine Dual Heater Bread Maker Machine Automatic with Nonstick Ceramic Pan, 15H Timer & 1H Keep Warm Set, Low Noise, Stainless Steel Breadmaker Recipe-Green |
|
| 6 | Amazon Basics Programmable Bread Maker, 2 Pound Non-Stick Automatic Bread Making Machine, 14 Settings for Breads, Doughs, Gluten-Free Options and More, LCD Display, White |
|
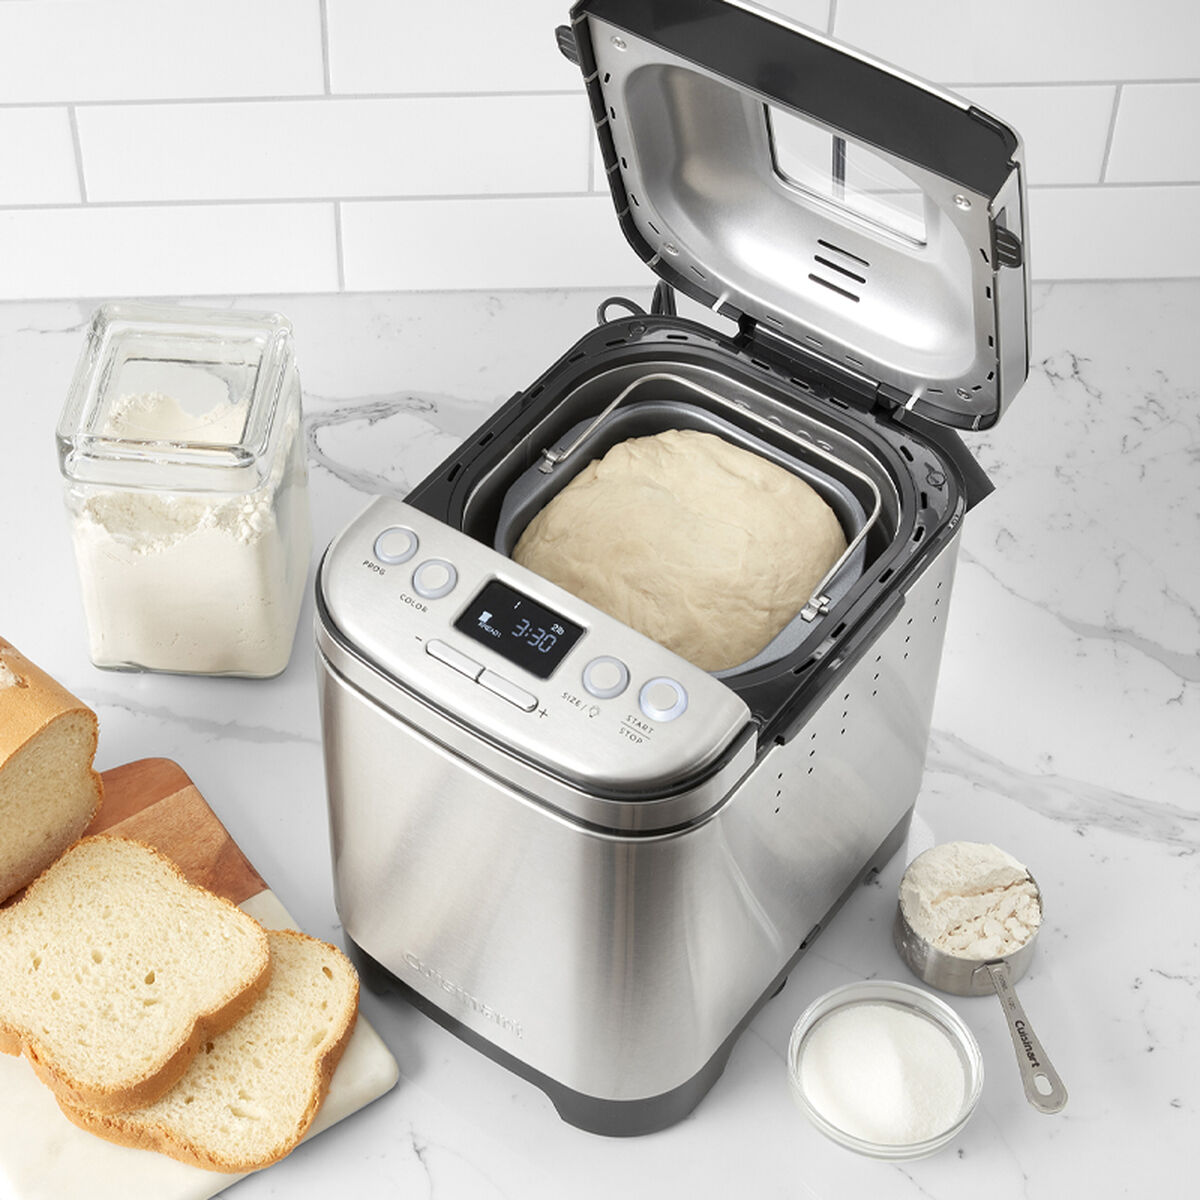
| 7 | Cuisinart Bread Maker Machine, Stainless Steel Convection Bread Machine with 16 Menu Options, 3 Loaf Sizes Up to 2 Lb., 3 Crust Colors, Includes Measuring Cup, Spoon & Kneading Hook, CBK-210 |
|
| 8 | 2LB Bread Maker Machine, OSIPOTO 17 in 1 Automatic Stainless Steel Bread Machine, Non-stick, Beginner-Friendly Controls, 15 Hour Timer, Easy to Clean Low Noise, High Success Rate for Homemade Bread |
|
| 9 | Rosewill 25-in-1 Automatic Bread Maker Machine with 3 Loaf Size up to 2 Lb, 700W High Power Dual Heater Bread Maker with BPA-free Nonstick Coating Pan, Max 15 Hours Delay Timer, Low Noise - Gray |
|
| 10 | Cuisinart Bread Maker Machine, Stainless Steel Automatic Bread Machine with 12 Menu Options, 3 Loaf Sizes up to 2 Lb., 3 Crust Colors, Removable Nonstick Baking Pan & Kneading Paddle, CBK-110NAS |
|
The Humble Beginnings: A Brief History of the Bread Maker
The concept of automated bread making isn’t new, but the widespread home bread maker machine truly emerged in the late 20th century, particularly gaining popularity in the 1980s and 90s. Born from a desire to simplify the often-laborious process of traditional bread baking—which involves precise mixing, kneading, proofing, and baking—early models were somewhat clunky but revolutionary. Over the decades, these machines have evolved dramatically, becoming more compact, quieter, and incredibly versatile, moving beyond basic white bread to handle a vast array of specialized recipes, from gluten-free options to sourdough and even jam. This evolution has made homemade bread accessible to everyone, regardless of baking experience.
What Exactly is a Bread Maker Machine and How Does It Work Its Magic?
At its heart, a bread maker machine is an ingenious, all-in-one appliance designed to automate the entire bread-making process. Forget stand mixers, dough hooks, and multiple rising bowls. This singular device takes care of everything from start to finish.
How does it work? The process typically begins when you add your ingredients into the bread pan in a specific order—usually liquids first, followed by dry ingredients, and finally, the yeast safely tucked away in a small well or on top of the flour. Once you select your desired cycle and press start, the machine springs to life. A motor-driven paddle (or sometimes two) at the bottom of the pan diligently mixes and kneads the dough to the perfect consistency. Then, a built-in heating element provides the ideal warmth for the dough to rise—a crucial step for a light, airy loaf. After the rising cycles are complete, the temperature increases, and the bread maker bakes your loaf to a beautiful golden brown, often with customizable crust settings. It’s a beautifully choreographed culinary dance, all within one compact unit.
Exploring the World of Bread Maker Machines: Types and Key Features
The market for bread maker machines is diverse, offering options to suit every baker’s needs and preferences. While the core function remains the same, variations in design and features can significantly enhance your baking experience.
Understanding the Differences
- Loaf Shape: Traditional bread makers often produce a vertical, “boxy” loaf. However, many modern machines now offer pans that yield a more conventional horizontal, rectangular loaf, perfect for sandwiches and toasting. Some even feature dual paddles to ensure more thorough kneading for these larger, wider loaves.
- Capacity: Machines typically range from 1-pound to 2.5-pound loaf capacities, catering to single individuals or larger families.
- Programmable Settings: This is where modern bread makers truly shine. Beyond the basic white bread cycle, you’ll find specialized programs for:
- Whole Wheat: Designed for denser whole grain flours, often with longer kneading and rising times.
- Gluten-Free: Specific cycles to accommodate the unique properties of gluten-free flours, which require less kneading.
- Dough Only: A fantastic feature if you prefer to shape and bake your bread in a conventional oven, or want to make pizza dough, dinner rolls, or cinnamon buns.
- Rapid/Express Bake: For when you need a loaf in a hurry, though often with a slightly denser texture.
- Sweet Bread/French Bread: Optimized for specific dough types.
- Jam and Cake: Yes, many bread makers can even stir and cook jam or bake quick breads and cakes!
- Delay Timer: This feature is a game-changer, allowing you to add ingredients in the evening and wake up to the smell of freshly baked bread in the morning.
- Automatic Dispensers: Some advanced models include compartments that automatically add fruits, nuts, or seeds at the optimal kneading stage, ensuring even distribution without you needing to be present.
- Crust Settings: Customize your loaf’s crust from light to medium to dark.
When choosing a bread maker machine, consider the types of bread you’ll make most often, your desired loaf size, and the convenience features that matter most to you.
The Essentials: Basic Ingredients and Tools for Bread Machine Baking
One of the great joys of a bread maker machine is its simplicity, and that extends to the ingredient list. You don’t need a pantry full of exotic items to start baking delicious bread.
Core Ingredients:
- Flour: This is the backbone of your bread.
- Bread Flour: Contains a higher protein content, leading to more gluten development, which results in a chewier, airier texture and a good rise.
- All-Purpose Flour: Can often be used, especially in recipes for quick breads or if you prefer a slightly softer, less chewy loaf. However, loaves made with all-purpose flour may not rise as high.
- Whole Wheat Flour: Used for whole wheat breads, which are denser and require specific bread maker cycles.
- Gluten-Free Flour Blends: Essential for gluten-free baking, requiring specialized recipes and cycles.
- Yeast: The magical leavening agent that makes bread rise.
- Bread Machine Yeast (or Instant Yeast/Rapid Rise Yeast): These are usually added directly to the dry ingredients without needing to be proofed first. They are ideal for delay timers.
- Active Dry Yeast: Requires dissolving in warm liquid first. If using, you typically shouldn’t use the delay timer function.
- Liquid: Water, milk, or buttermilk are common. Ensure it’s the correct temperature (often lukewarm) as specified by your recipe, as this impacts yeast activity.
- Salt: Crucial for flavor and regulating yeast activity. Don’t skip it!
- Sweetener: A little sugar, honey, or maple syrup can provide food for the yeast, enhance flavor, and aid in browning.
- Fat (Optional): Butter, oil, or margarine adds tenderness, moisture, and flavor to the crumb.
Essential Tool:
- Measuring Cups and Spoons: Accuracy is key in bread baking. While some experienced bakers “eyeball” it, precise measurements ensure consistent results.
How to Use Your Bread Maker Machine to Bake Perfect Bread: A Step-by-Step Guide
Making bread with a bread maker machine is incredibly straightforward. Follow these steps, and you’ll be enjoying fresh, homemade bread in no time!
- Measure Ingredients Precisely: This is the most critical step. Use accurate measuring cups and spoons. For best results, use a kitchen scale to weigh flour, as volume measurements can vary.
- Add Ingredients to the Bread Pan in Order: Most recipes recommend adding ingredients in this sequence:
- Liquids (water, milk, oil/butter) first, at the bottom of the pan.
- Dry ingredients (flour, sugar, salt) next, forming a layer over the liquids.
- Yeast last, placed in a small “well” or depression you create in the center of the flour. This prevents the yeast from activating too early, especially if using a delay timer.
- Expert Tip from Culinary Specialist Anya Sharma: “Always follow your bread maker’s specific ingredient order. It’s designed to optimize the mixing and rising processes, ensuring your yeast activates at just the right time for a perfect loaf.”
- Place the Pan in the Machine: Securely insert the bread pan into its slot within the bread maker.
- Select Your Cycle and Settings: Choose the program that matches your recipe (e.g., “Basic White,” “Whole Wheat,” “Dough”). Select your desired crust darkness (light, medium, dark) and loaf size (1 lb, 1.5 lb, 2 lb). If using a delay timer, set it now.
- Press Start: Let your bread maker machine do all the work!
- Remove and Cool: Once the cycle is complete, the machine will usually beep. Promptly remove the bread pan (using oven mitts, as it will be hot!). Carefully invert the pan to release the loaf onto a wire cooling rack. It’s essential to let the bread cool completely—ideally for at least an hour—before slicing. This allows the internal structure to set and prevents a gummy texture.
Elevate Your Baking: Tips and Creative Recipe Variations with Your Bread Maker
Your bread maker machine is capable of so much more than just a basic white loaf. With a few tips and creative twists, you can unlock a world of flavors.
Essential Tips for Success
- Mind Your Yeast: The type of yeast and its freshness are paramount. Ensure your yeast hasn’t expired, and store it properly. If your bread isn’t rising, old yeast is often the culprit.
- Ingredient Temperature: Most recipes call for room-temperature ingredients, especially liquids, to ensure optimal yeast activity. Cold liquids can slow down or inhibit rising.
- Humidity Matters: On very humid days, you might need slightly less liquid; on dry days, a touch more. Pay attention to your dough during the initial kneading cycle – it should form a smooth, elastic ball. If it’s too sticky, add a teaspoon of flour at a time; if too dry, add a teaspoon of water.
- Don’t Open the Lid: Resist the temptation to peek during the rising and baking cycles. Opening the lid can cause temperature fluctuations that might deflate your dough.
- Clean Up Promptly: Remove the kneading paddle and clean the bread pan immediately after use to prevent dough residue from hardening.
Delicious Bread Maker Variations:
- Herb and Garlic Bread: Add dried herbs (like rosemary or oregano) and minced garlic to your basic white bread recipe.
- Cheese and Onion Loaf: Incorporate shredded cheddar or Parmesan cheese and dried onion flakes.
- Cinnamon Raisin Swirl: Use the “Dough” cycle, then roll out the dough, spread with cinnamon sugar and raisins, roll it up, and bake in your oven.
- Sun-Dried Tomato & Feta: A Mediterranean twist perfect for pairing with salads.
- Sweet Potato Bread: Replace some liquid with mashed sweet potato for a moist, flavorful loaf.
- Pizza Dough: Use the “Dough” cycle, then remove and shape for homemade pizza night!
- Jam: Many machines have a “Jam” cycle that will stir and cook fruit for a delightful homemade spread.
The Undeniable Benefits of Homemade Bread with a Bread Maker Machine
Why invest in a bread maker machine? The advantages extend far beyond just having fresh bread on demand.
- Unrivaled Freshness and Flavor: Nothing compares to the taste and aroma of a loaf straight from the oven. The bread maker delivers this experience effortlessly.
- Healthier Choices: You control every ingredient. No mysterious additives, preservatives, or high-fructose corn syrup. You can opt for whole grains, reduce sugar, or add beneficial seeds.
- Cost Savings: While there’s an initial investment, making your own bread is often significantly cheaper than buying artisanal loaves from a bakery, especially over time.
- Incredible Convenience: This is the ultimate “set it and forget it” appliance. Simply add ingredients, press a button, and return hours later to a perfect loaf. The delay timer feature is a true blessing for busy schedules.
- Reduced Mess: All the mixing, kneading, and rising happen within the machine’s sealed compartment, keeping your kitchen counters clean.
- Versatility: From basic sandwich bread to pizza dough, gluten-free loaves, and even sweet treats, the range of what you can create is impressive.
- Perfect Proofing: The controlled environment of a bread maker ensures optimal dough rising, regardless of your kitchen’s ambient temperature or drafts, leading to consistently good results.
Savoring Your Homemade Loaf: Serving Suggestions and Pairings
You’ve put in the (minimal) effort, and now you have a magnificent loaf of homemade bread from your bread maker machine. How best to enjoy it?
- Classic Comfort: Slice it thick, toast it lightly, and slather with butter and your favorite jam or honey. A timeless breakfast or snack.
- Sandwich Superstar: Homemade bread elevates any sandwich. Think grilled cheese, turkey and avocado, or a classic BLT.
- Soup and Stew Companion: A crusty slice is perfect for soaking up the rich flavors of a hearty soup, stew, or chili.
- Bruschetta or Crostini: Slice thinly, toast, rub with garlic, drizzle with olive oil, and top with fresh tomatoes, basil, and mozzarella for an elegant appetizer.
- Garlic Bread: Brush with melted butter, minced garlic, and parsley, then broil for a few minutes. An ideal side for pasta dishes.
- French Toast: Stale homemade bread makes the best French toast, soaking up the eggy custard beautifully.
- Bread Pudding: Transform leftover bread into a delicious, comforting dessert.
Experiment with different serving styles to truly appreciate the incredible flavor and texture of your homemade creation.
Frequently Asked Questions About Bread Maker Machines
How long does it take to make bread in a bread maker machine?
Typically, a standard loaf on a “Basic White” cycle takes between 3 to 4 hours from start to finish. Rapid cycles can produce bread in about 1.5 hours, while longer cycles for whole wheat or specialty breads might take up to 5 hours.
Can I really make gluten-free bread in a bread maker?
Yes, absolutely! Many modern bread maker machines have a dedicated “Gluten-Free” cycle designed to handle the different kneading and rising requirements of gluten-free flours, often yielding excellent results.
Do I have to use bread flour, or can I use all-purpose flour?
You can often use all-purpose flour, especially in recipes for quick breads or if you prefer a softer crumb. However, bread flour, with its higher protein content, generally produces a chewier, airier loaf with a better rise. Always check your specific recipe for recommendations.
Why is my bread maker bread dense or not rising?
Common reasons for dense bread include old or inactive yeast, incorrect liquid temperature (too hot or too cold), inaccurate measurements (especially too much flour or not enough liquid), or forgetting the salt (which regulates yeast). Ensure your ingredients are fresh and measured precisely.
Can I prepare dough in the bread maker and bake it in my regular oven?
Absolutely! Most bread maker machines have a “Dough” cycle. This completes the mixing, kneading, and first rise. You can then remove the dough, shape it as desired (for rolls, pizza, baguettes), and bake it in your conventional oven.
Is it worth buying a bread maker machine?
For convenience, consistent results, the joy of fresh homemade bread, and control over ingredients, a bread maker machine is definitely worth it. It eliminates the mess and much of the effort traditionally associated with bread baking, making it accessible for everyone.
The Simple Joy of a Bread Maker Machine
There’s a unique satisfaction that comes from slicing into a warm loaf of bread, knowing you made it yourself. With a bread maker machine, that satisfaction becomes an everyday possibility, no culinary school required. It’s an appliance that brings warmth, aroma, and deliciousness back to the heart of your home with minimal fuss. So, go ahead, embrace the journey, experiment with different flours and flavors, and share the comforting goodness of homemade bread. Your kitchen (and your taste buds) will thank you!