Waking up to the irresistible aroma of freshly baked bread filling your home is a simple pleasure that a Sunbeam bread maker makes incredibly accessible. Gone are the days of tedious kneading, rising, and baking by hand. With a Sunbeam bread maker, you can effortlessly transform a few basic ingredients into a delicious loaf, enjoying homemade goodness with minimal effort. This guide will walk you through everything you need to know about these fantastic kitchen companions, from their history to tips for baking your perfect loaf.
The journey of bread making has evolved dramatically over centuries, moving from ancient hearths to modern, automated machines. Bread makers first gained popularity in the 1980s, bringing the joy of homemade bread to busy households. Brands like Sunbeam quickly recognized the demand for affordable, reliable appliances that could simplify this age-old craft. Over the years, the Sunbeam bread maker has become a household name, known for its user-friendly design and consistent performance, making it a favorite for both novice bakers and seasoned enthusiasts. These machines democratized bread baking, allowing anyone to enjoy warm, fresh bread without needing expert culinary skills or extensive time commitments.
|
Our Picks for the Best Bread Maker in 2026
As an Amazon Associate I earn from qualifying purchases.
|
||
| Num | Product | Action |
|---|---|---|
| 1 | Cuisinart Bread Maker Machine, Stainless Steel Automatic Bread Machine with 12 Menu Options, 3 Loaf Sizes up to 2 Lb., 3 Crust Colors, Removable Nonstick Baking Pan & Kneading Paddle, CBK-110NAS |

|
| 2 | Amazon Basics Programmable Bread Maker, 2 Pound Non-Stick Automatic Bread Making Machine, 14 Settings for Breads, Doughs, Gluten-Free Options and More, LCD Display, White |
|
| 3 | KBS Pro 710W Bread Maker, 2LB 17-in-1 Automatic Bread Machine with Healthy Ceramic Pan, Nut Dispenser, Tempered Glass Touch Panel, Stainless Steel Housing,3 Crust Colors, 15H Timer&Keep-Warm, Recipe |
|
| 4 | 2LB Bread Maker Machine, OSIPOTO 17 in 1 Automatic Stainless Steel Bread Machine, Non-stick, Beginner-Friendly Controls, 15 Hour Timer, Easy to Clean Low Noise, High Success Rate for Homemade Bread |
|
| 5 | Cuisinart Bread Maker Machine, Stainless Steel Convection Bread Machine with 16 Menu Options, 3 Loaf Sizes Up to 2 Lb., 3 Crust Colors, Includes Measuring Cup, Spoon & Kneading Hook, CBK-210 |
|
| 6 | KITCHENARM 29-in-1 SMART Bread Machine with Gluten Free Setting 2LB 1.5LB 1LB Bread Maker Machine with Homemade Cycle - Stainless Steel Breadmaker with Recipes Whole Wheat Bread Making Machine |
|
| 7 | Neretva Bread Maker, 20-IN-1 2LB Bread Machine Dual Heater Bread Maker Machine Automatic with Nonstick Ceramic Pan, 15H Timer & 1H Keep Warm Set, Low Noise, Stainless Steel Breadmaker Recipe-Green |
|
| 8 | Elite Gourmet EBM8103M Programmable Bread Maker Machine 3 Loaf Sizes, 19 Menu Functions Gluten Free White Wheat Rye French and more, 2 Lbs, Mint |
|
| 9 | Rosewill 25-in-1 Automatic Bread Maker Machine with 3 Loaf Size up to 2 Lb, 700W High Power Dual Heater Bread Maker with BPA-free Nonstick Coating Pan, Max 15 Hours Delay Timer, Low Noise - Gray |
|
| 10 | Elite Gourmet EBM8103B Programmable Bread Maker Machine 3 Loaf Sizes, 19 Menu Functions Gluten Free White Wheat Rye French and more, 2 Lbs, Black |
|
What Makes a Bread Maker a Kitchen Essential?
A bread maker is more than just an appliance; it’s a dedicated bakery in a box. It handles every step of the bread-making process: mixing, kneading, rising, and baking. You simply add your ingredients, select a program, and let the machine do the rest. For many, a Sunbeam bread maker represents convenience and control over what goes into their food. You can choose your ingredients, avoid preservatives, and tailor recipes to dietary needs, all while saving time and energy compared to traditional baking methods. It’s a game-changer for anyone who loves the taste of fresh bread but dreads the work.
Exploring Sunbeam Bread Maker Models and Key Features
Sunbeam offers a range of bread makers designed to cater to various needs and budgets, with models like the widely popular Sunbeam 5891 standing out for its reliability and value. While specific features can vary slightly between models, several core functionalities make a Sunbeam bread maker a smart investment.
Most Sunbeam models are capable of producing loaves weighing between 1.5 and 2 pounds, making them suitable for individuals and small families. They often come equipped with 12 to 14 pre-programmed settings, offering versatility for different bread types. These typically include:
- Basic Bread: For everyday white or mixed grain loaves.
- French Bread: A classic choice for a crispy crust and airy interior.
- Whole Wheat: Optimized for the denser texture of whole grain flours.
- Sweet Bread: Perfect for cinnamon rolls, brioche, or other enriched doughs.
- Express Bake: A fast-bake option for when you need a loaf in under an hour (though sometimes resulting in a denser texture).
- Dough Cycle: Prepares dough for pizza, rolls, or pastries that you can then bake in a conventional oven.
- Jam Cycle: Yes, many Sunbeam bread makers can even make homemade jams and jellies!
- Cake Cycle: For mixing and baking quick breads or cakes.
Beyond these programs, a Sunbeam bread maker usually features three crust shade settings (light, medium, dark), allowing you to customize your loaf’s exterior to your preference. A highly appreciated feature is the 13-hour delay timer, which means you can load ingredients the night before and wake up to a freshly baked loaf, or have one ready just as you arrive home. Many models also include a large viewing window, letting you peek at your bread’s progress without disrupting the baking process. Some advanced models might even include automatic fruit and nut dispensers for perfect mix-ins.
“A good bread maker isn’t just about baking bread; it’s about adding a touch of magic to your daily routine,” says Eleanor Vance, a seasoned home baker and culinary educator. “The convenience of a Sunbeam bread maker means you can enjoy that fresh-from-the-oven goodness without the fuss, making healthy eating so much easier.”
Essential Ingredients and Tools for Your Sunbeam Bread Maker
Making delicious bread with your Sunbeam bread maker starts with the right ingredients and a few simple tools. You don’t need a gourmet pantry, just the basics:
Basic Ingredients:
- Flour: Bread flour is often recommended for its higher protein content, which develops strong gluten for a good rise. All-purpose flour can also work for many recipes. For specific recipes, you might need whole wheat flour, rye flour, or gluten-free flour blends.
- Yeast: Active dry yeast or instant (bread machine) yeast are commonly used. Ensure your yeast is fresh and active for the best results.
- Water (or Milk): Liquid is crucial for activating yeast and forming the dough. The temperature is important – typically lukewarm (around 105-115°F or 40-46°C) is ideal, especially for Express Bake settings.
- Salt: Essential for flavor and controlling yeast activity.
- Sugar (or Honey/Maple Syrup): Feeds the yeast and contributes to the crust’s browning and flavor.
- Fat (Butter, Oil, Margarine): Adds richness, moisture, and tenderizes the crumb.
Necessary Tools:
- Measuring Cups and Spoons: Accurate measurement is key in bread making. Your Sunbeam bread maker often comes with these, but having a reliable set is always good.
- Rubber Spatula: Useful for scraping down the sides of the bread pan if ingredients get stuck during mixing.
- Oven Mitts: For safely removing the hot bread pan.
- Cooling Rack: Allows air circulation around the baked loaf, preventing sogginess.
- Bread Knife: A serrated knife is best for slicing fresh bread cleanly.
Step-by-Step: How to Use Your Sunbeam Bread Maker
Using a Sunbeam bread maker is incredibly straightforward, even for absolute beginners. Here’s a general guide to baking a perfect loaf:
- Prepare the Pan: Ensure your bread pan is clean and the kneading paddle is securely attached to the shaft at the bottom.
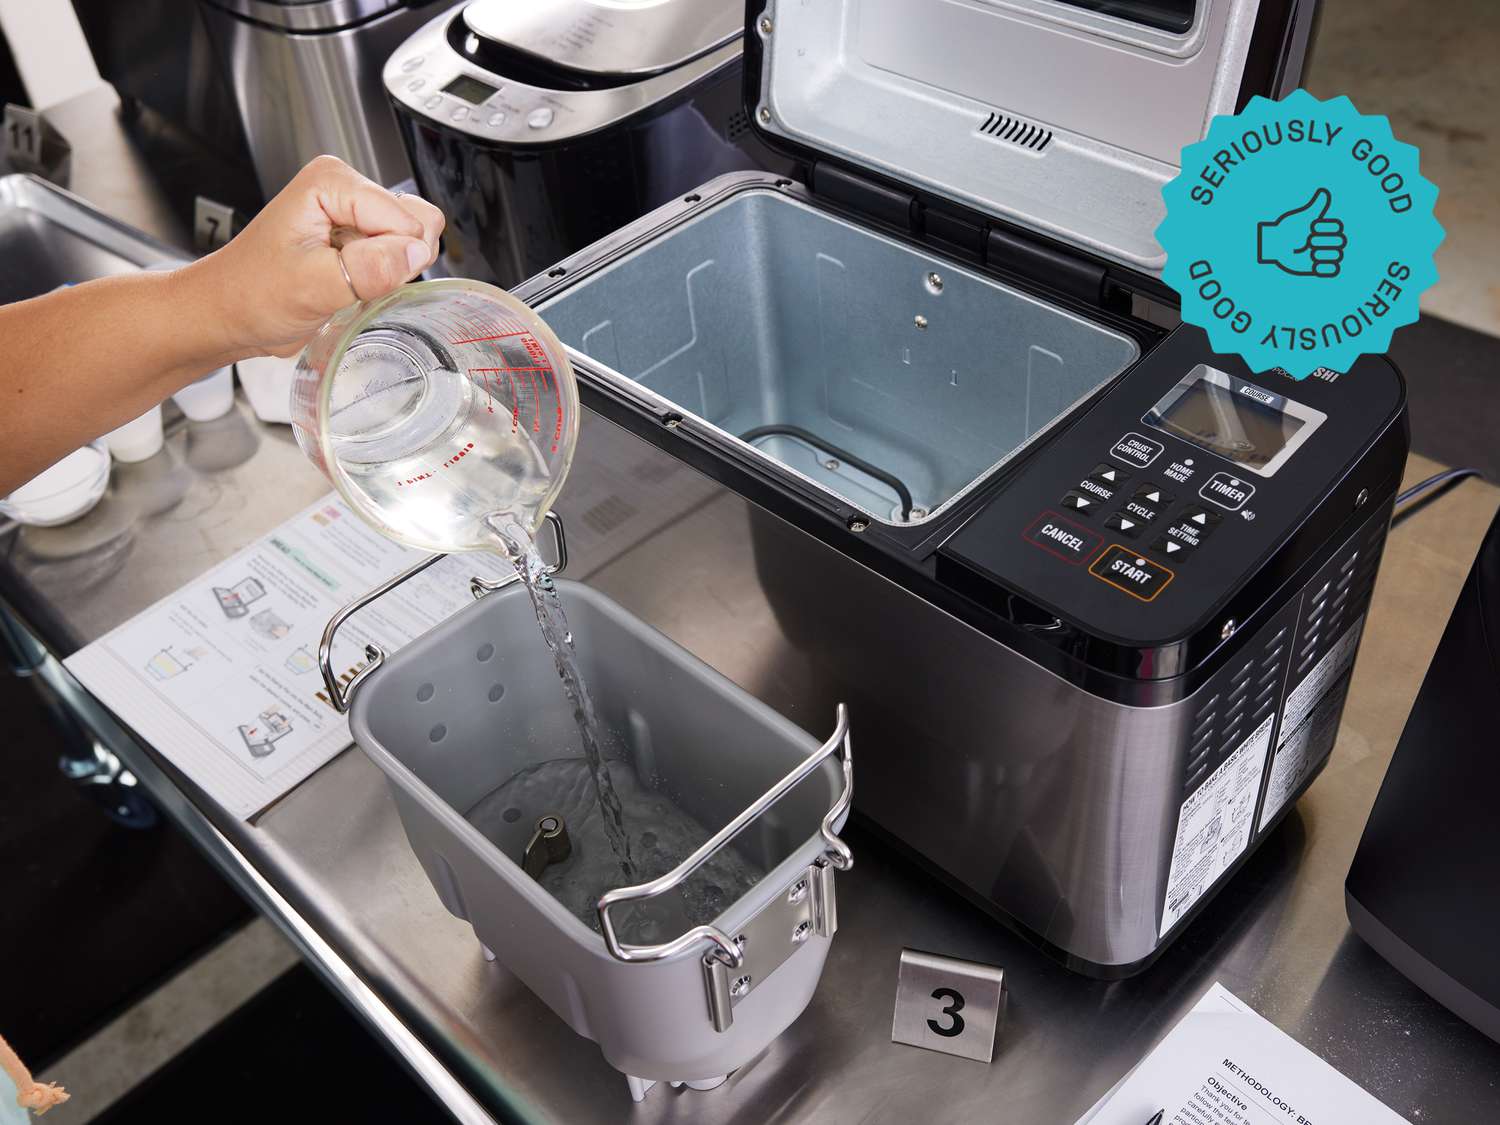
- Add Liquids First: Following your recipe, pour the specified amount of water or milk into the bread pan. Some recipes might also call for melted butter or oil at this stage.
- Add Dry Ingredients (Except Yeast): Next, add your dry ingredients, such as salt, sugar, and flour. It’s crucial to layer them carefully to prevent the yeast from coming into direct contact with liquids or salt prematurely. Create a small well in the center of the flour.
- Add Yeast Last: Carefully add the yeast into the well you created in the flour. This separation helps ensure the yeast is activated at the right time in the cycle.
- Insert Pan into Machine: Place the bread pan firmly into your Sunbeam bread maker, ensuring it clicks into place. Close the lid.
- Select Program: Plug in the machine. Using the control panel, select the desired program (e.g., “Basic” for a standard white loaf) and crust setting (light, medium, or dark). If using the delay timer, set it now.
- Start Baking: Press the “Start” button. The machine will begin its cycle of mixing, kneading, rising, and baking. Avoid opening the lid during the kneading and baking cycles, especially during Express Bake, as this can affect the loaf’s rise and texture.
- Cool and Enjoy: Once the cycle is complete, the machine will beep. Carefully remove the hot bread pan using oven mitts. Invert the pan to release the loaf onto a cooling rack. Allow the bread to cool for at least 15-20 minutes before slicing. This allows the internal structure to set and makes for easier slicing.
Tips and Recipe Variations for Your Sunbeam Bread Maker
Getting the most out of your Sunbeam bread maker often comes down to a few clever tips and a willingness to experiment.
- Ingredient Order Matters: Always add liquids first, then dry ingredients, with yeast last, safely nestled atop the flour and away from liquids and salt. This layering prevents premature yeast activation.
- Temperature is Key: Use lukewarm water (around 105-115°F or 40-46°C) unless your recipe specifies otherwise, particularly for Express Bake settings. Cold liquids can inhibit yeast, while hot liquids can kill it.
- Accurate Measuring: Bread baking is a science. Use proper measuring cups and spoons, leveling off dry ingredients like flour for consistent results.
- Don’t Open the Lid: Resist the urge to peek during the kneading and especially the rising and baking cycles. Opening the lid can cause temperature fluctuations that lead to a collapsed or uneven loaf.
- Adjust for Humidity: On very humid days, you might need slightly less liquid; on very dry days, a little more. Observe the dough during the first kneading cycle through the viewing window—it should form a smooth, elastic ball. If it’s too sticky, add a teaspoon of flour; if too dry, a teaspoon of water.
- Experiment with Flours: While bread flour is a go-to, try blending different flours like rye, oat, or spelt for unique flavors and textures.
- Get Creative with Add-ins: Enhance your bread with seeds (chia, flax, sunflower), dried fruits (raisins, cranberries), nuts (walnuts, pecans), or cheese. For best results, add these during the “add-in” signal (if your machine has one) or during the last 5-10 minutes of the final kneading cycle.
Beyond traditional loaves, your Sunbeam bread maker is incredibly versatile. You can use the dough cycle for:
- Pizza Dough: Roll out fresh pizza bases.
- Dinner Rolls or Buns: Shape and bake in your oven.
- Pretzels or Bagels: Boil and bake for an authentic touch.
- Sweet Doughs: For cinnamon rolls, sticky buns, or fruit breads.
The jam setting is also a fantastic way to make small batches of homemade jam with seasonal fruits, while the cake setting is perfect for quick breads like banana bread or zucchini bread.
The Undeniable Benefits of Homemade Bread from Your Sunbeam Bread Maker
Making your own bread with a Sunbeam bread maker offers a bounty of advantages that extend beyond just a delicious taste.
- Unmatched Freshness: There’s nothing quite like bread straight from the oven. Homemade bread is free from the preservatives found in store-bought loaves and maintains its freshness and flavor for longer.
- Control Over Ingredients: You decide what goes into your bread. This is invaluable for managing dietary restrictions, allergies, or simply opting for healthier, organic ingredients. No artificial additives, high-fructose corn syrup, or unknown chemicals.
- Cost-Effective: Over time, baking your own bread can be significantly cheaper than regularly buying artisan loaves or even standard white bread from the grocery store.
- Therapeutic Experience: While the machine does the hard work, the process of choosing ingredients and anticipating a fresh loaf can be surprisingly calming and rewarding. And the aroma? Pure bliss!
- Variety at Your Fingertips: From savory herb breads to sweet cinnamon swirls, your Sunbeam bread maker allows you to explore an endless array of recipes and customize them to your family’s preferences.
- Reduced Waste: You can bake exactly the amount you need, reducing food waste compared to buying larger loaves that might go stale.
How to Enjoy Your Homemade Bread and Accompaniments
Once your Sunbeam bread maker has worked its magic, the real fun begins: enjoying your creation! Here are some delightful ways to savor your homemade bread and elevate your meals:
- Classic Toast: Thick slices, lightly toasted and slathered with butter, jam (perhaps homemade with your bread maker!), or your favorite spread.
- Sandwiches and Paninis: Elevate your lunch game with fresh bread. A simple ham and cheese, a gourmet turkey club, or a vibrant veggie sandwich tastes infinitely better on homemade bread.
- Bruschetta or Crostini: Slice thinly, toast lightly, and top with fresh tomatoes, basil, garlic, and olive oil, or a variety of other savory toppings.
- Bread Pudding: Use slightly stale homemade bread to create a comforting and rich dessert.
- Croutons: Cube leftover bread, toss with olive oil and herbs, and bake until crispy for a salad topping or soup accompaniment.
- With Soup or Stew: A hearty slice of homemade bread is the perfect partner for a warming bowl of soup or a robust stew, ideal for soaking up every last drop.
- Cheese Boards: A rustic loaf from your Sunbeam bread maker is a wonderful addition to a cheese and charcuterie board, providing the perfect vehicle for various cheeses and spreads.
Frequently Asked Questions About Your Sunbeam Bread Maker
Q: How do Sunbeam bread makers handle gluten-free bread?
A: Many newer Sunbeam bread maker models include a dedicated gluten-free setting. If your model doesn’t, you can often use the whole wheat or basic setting with specific gluten-free recipes, though results might vary. Always consult your specific model’s manual and experiment with trusted gluten-free bread machine recipes.
Q: Can I make jam in a Sunbeam bread maker?
A: Yes, many Sunbeam bread maker models feature a specific “Jam” cycle. This cycle cooks and stirs fruit and sugar to create delicious homemade jams with minimal effort.
Q: What are the best loaf sizes for a Sunbeam machine?
A: Most Sunbeam bread makers typically make 1.5-pound or 2-pound loaves. For smaller households, a 1.5-pound loaf is often perfect, while 2-pound loaves are great for families or when you want more leftovers. Some users find that 2-pound loaves can cause the machine to vibrate more during kneading, so monitor it if baking larger sizes.
Q: Why is my bread dense with the Express Bake setting?
A: The Express Bake setting rapidly speeds up the rising and baking process. While convenient, this often results in a denser loaf compared to standard cycles. For lighter, airier bread, it’s best to use the longer basic or whole wheat programs.
Q: How do I clean my Sunbeam bread maker?
A: Always unplug your Sunbeam bread maker and allow it to cool completely before cleaning. The bread pan and kneading paddle are usually non-stick and removable, so they can be washed with warm, soapy water and a soft sponge. Never submerge the main unit in water. Wipe down the exterior and interior baking chamber with a damp cloth.
Q: My bread isn’t rising properly. What could be wrong?
A: Common culprits for poor rise include inactive or expired yeast, incorrect water temperature, too much or too little salt or sugar, or inaccurate flour measurements. Ensure your ingredients are fresh, water is lukewarm, and measurements are precise.
Q: Can I add nuts and fruits to my Sunbeam bread?
A: Absolutely! Many Sunbeam bread maker models will beep during a specific stage of the kneading cycle, signaling the ideal time to add nuts, seeds, or dried fruits. This prevents them from being chopped too finely or sinking to the bottom.
Embrace the Joy of Homemade Baking
The Sunbeam bread maker is more than just a kitchen gadget; it’s an invitation to a world of fresh, delicious, and wholesome bread right in your own home. It takes the intimidation out of baking, allowing you to enjoy the unparalleled taste and aroma of homemade loaves with remarkable ease. Whether you’re a beginner eager to try your hand at baking or a seasoned pro looking for ultimate convenience, a Sunbeam bread maker provides a reliable and rewarding experience. So, roll up your sleeves (or just press a button!), gather your ingredients, and embark on your journey to endless homemade bread possibilities. Experiment with flavors, discover new recipes, and share the warmth of fresh bread with your loved ones. Happy baking!