There’s something uniquely comforting about the aroma of freshly baked bread wafting through your kitchen, isn’t there? It’s a smell that instantly transforms a house into a home, inviting warmth and coziness. For many, the idea of baking bread from scratch feels daunting, a task reserved for seasoned bakers. But what if I told you there’s a simple, reliable way to achieve bakery-quality loaves right on your countertop? Enter the Hamilton Beach Bread Maker Machine, a kitchen ally designed to make homemade bread accessible to everyone. This machine is celebrated for its user-friendly interface, versatility, and exceptional value, making it a beloved choice for both beginners and experienced home bakers.
|
Our Picks for the Best Bread Maker in 2026
As an Amazon Associate I earn from qualifying purchases.
|
||
| Num | Product | Action |
|---|---|---|
| 1 | Amazon Basics Programmable Bread Maker, 2 Pound Non-Stick Automatic Bread Making Machine, 14 Settings for Breads, Doughs, Gluten-Free Options and More, LCD Display, White |

|
| 2 | Rosewill 25-in-1 Automatic Bread Maker Machine with 3 Loaf Size up to 2 Lb, 700W High Power Dual Heater Bread Maker with BPA-free Nonstick Coating Pan, Max 15 Hours Delay Timer, Low Noise - Gray |
|
| 3 | Elite Gourmet EBM8103B Programmable Bread Maker Machine 3 Loaf Sizes, 19 Menu Functions Gluten Free White Wheat Rye French and more, 2 Lbs, Black |
|
| 4 | Elite Gourmet EBM8103M Programmable Bread Maker Machine 3 Loaf Sizes, 19 Menu Functions Gluten Free White Wheat Rye French and more, 2 Lbs, Mint |
|
| 5 | Neretva Bread Maker, 20-IN-1 2LB Bread Machine Dual Heater Bread Maker Machine Automatic with Nonstick Ceramic Pan, 15H Timer & 1H Keep Warm Set, Low Noise, Stainless Steel Breadmaker Recipe-Green |
|
| 6 | Cuisinart Bread Maker Machine, Stainless Steel Automatic Bread Machine with 12 Menu Options, 3 Loaf Sizes up to 2 Lb., 3 Crust Colors, Removable Nonstick Baking Pan & Kneading Paddle, CBK-110NAS |
|
| 7 | 2LB Bread Maker Machine, OSIPOTO 17 in 1 Automatic Stainless Steel Bread Machine, Non-stick, Beginner-Friendly Controls, 15 Hour Timer, Easy to Clean Low Noise, High Success Rate for Homemade Bread |
|
| 8 | KBS Pro 710W Bread Maker, 2LB 17-in-1 Automatic Bread Machine with Healthy Ceramic Pan, Nut Dispenser, Tempered Glass Touch Panel, Stainless Steel Housing,3 Crust Colors, 15H Timer&Keep-Warm, Recipe |
|
| 9 | KITCHENARM 29-in-1 SMART Bread Machine with Gluten Free Setting 2LB 1.5LB 1LB Bread Maker Machine with Homemade Cycle - Stainless Steel Breadmaker with Recipes Whole Wheat Bread Making Machine |
|
| 10 | Cuisinart Bread Maker Machine, Stainless Steel Convection Bread Machine with 16 Menu Options, 3 Loaf Sizes Up to 2 Lb., 3 Crust Colors, Includes Measuring Cup, Spoon & Kneading Hook, CBK-210 |
|
The Evolution of Homemade Bread: From Oven to Appliance
For centuries, bread-making was a labor-intensive art, involving hours of kneading, proofing, and precise oven management. Bakers poured their heart and soul into each loaf, a tradition passed down through generations. However, modern life demands convenience, and thus, the bread machine was born. This ingenious appliance revolutionized home baking, automating the entire process from mixing to baking. Among the array of options, the Hamilton Beach Bread Maker Machine has carved out a significant niche, embodying reliability and simplicity. It brings the rich tradition of homemade bread into the modern kitchen without the fuss, allowing you to enjoy fresh loaves with minimal effort.
Unpacking Your Hamilton Beach Bread Maker: Features That Matter
The Hamilton Beach Bread Maker Machine comes packed with features designed to simplify your baking journey. Understanding these functionalities will help you unlock its full potential.
User-Friendly Interface
One of the standout qualities of the Hamilton Beach Bread Maker is its intuitive design. Featuring easy-to-understand digital controls and a straightforward, one-touch operation, it removes the guesswork from bread making. You don’t need to be a tech wizard to get started; just select your settings and press a button.
Versatile Program Settings
These machines typically offer between 12 and 14 programmed settings, catering to a wide array of baking needs. You can effortlessly switch between cycles for basic white bread, hearty whole wheat, delicate French bread, and specialized options like gluten-free loaves. Beyond traditional breads, many models also include settings for making dough for pizzas or rolls, sweet breads, and even jam or cake. This versatility encourages experimentation and creativity in the kitchen.
Loaf Sizes & Crust Control
The Hamilton Beach Bread Maker provides flexibility with three common loaf sizes: 1 lb, 1.5 lb, and 2 lb, allowing you to bake just the right amount for your family or occasion. Additionally, you have control over the crust color, with options for light, medium, and dark. This ensures your bread turns out exactly to your preference, from a delicately golden exterior to a rich, crispy crust.
Convenience Features
Modern bread machines are all about convenience. The digital timer and auto cycles mean you can add ingredients, set a delay timer, and wake up to the smell of freshly baked bread. A built-in viewing window allows you to peek at your loaf’s progress without disturbing the baking cycle. When it comes to cleanup, the non-stick bread pan and kneading paddle are often dishwasher-safe, making post-baking tidying a breeze. Plus, their compact size means they fit neatly on most countertops and are easy to store away.
Getting Started: Essential Ingredients and Tools for Your Bread Maker
To embark on your bread-making adventure with your Hamilton Beach Bread Maker Machine, you’ll need a few basic ingredients and tools. Precision is key in bread making, so gather your supplies carefully.
Key Ingredients
- Flour: Bread flour is ideal for most loaves due to its higher protein content, yielding a chewier texture. All-purpose flour can work, but results may vary. For specific diets, gluten-free flour blends are essential when using the gluten-free setting.
- Yeast: Always use “bread machine yeast” or “instant yeast” for optimal results, as it activates quickly and evenly.
- Liquids: Water, milk, or buttermilk provide the necessary moisture. Ensure liquids are at room temperature or slightly warm (around 90-100°F or 32-38°C) to activate the yeast effectively.
- Salt: Essential for flavor and controlling yeast activity.
- Sugar: Feeds the yeast, contributes to browning, and enhances flavor.
- Fat: Butter or vegetable oil adds richness, moisture, and helps with crust softness.
Essential Tools
- Measuring Cups and Spoons: Accurate measurement is crucial for bread machine recipes.
- Rubber Spatula: Useful for scraping down the sides of the pan during mixing, if needed.
- Bread Knife: A serrated knife is best for cleanly slicing warm, fresh bread.
- Cooling Rack: Allows air circulation around the loaf for even cooling and prevents sogginess.
Your First Loaf: A Step-by-Step Guide to Using Your Hamilton Beach Bread Maker
Ready to bake? Let’s make a classic white bread loaf using your Hamilton Beach Bread Maker Machine.
1. Preparation
First things first, ensure your bread maker pan is clean and the kneading paddle is securely inserted onto its spindle at the bottom of the pan.
2. Adding Ingredients
The order of ingredients is vital for proper mixing and yeast activation. Always add liquids first, followed by the dry ingredients, and finally, the yeast. For a 2 lb white bread loaf, here’s a reliable recipe:
- Ingredients:
- 1 1/3 cups water
- 1 1/2 teaspoons salt
- 2 Tablespoons sugar
- 1/4 cup butter or vegetable oil
- 4 1/2 cups bread flour
- 1 3/4 teaspoons bread machine yeast
Carefully place the water, salt, sugar, and butter/oil into the bread pan. Then, add the bread flour, making sure it covers the liquid ingredients. Create a small well in the center of the flour, avoiding direct contact with the liquid, and add the bread machine yeast into this well.
3. Selecting Settings
Once ingredients are loaded, place the pan into the bread maker. Close the lid. Choose the “Basic Bread Cycle,” select “2 pound” for the loaf size, and “Medium” for the crust color.
4. Starting the Machine
Press the “Start” button. The machine will now take over, mixing, kneading, proofing, and baking your loaf automatically. You can relax and enjoy the delightful aromas filling your kitchen!
5. Post-Baking
When the cycle is complete, the machine will usually beep. Carefully remove the hot bread pan using oven mitts. Invert the pan to release the loaf onto a cooling rack. The kneading paddle might be stuck in the bottom of the loaf; gently remove it. Let your homemade bread cool for at least 10 minutes before slicing. This allows the internal structure to set, preventing a gummy texture.
Elevating Your Baking: Tips and Recipe Variations with Your Hamilton Beach
The Hamilton Beach Bread Maker Machine is incredibly versatile, inviting you to experiment beyond the basic loaf. Here are some tips and ideas to enhance your bread-making experience:
Optimizing Dough Consistency
One common tip from seasoned bread machine users is to “tweak the water” slightly. Depending on the humidity and type of flour, you might need a tiny bit more water than a recipe suggests to achieve a perfect, soft, and stretchy dough that’s not sticky. Observe your dough during the first kneading cycle through the viewing window; it should form a smooth ball.
Beyond Basic Bread
Your Hamilton Beach bread maker is a dough-making powerhouse! Utilize the “Dough” cycle to prepare perfectly kneaded dough for a variety of treats. Think homemade pizza crusts, soft dinner rolls, warm cinnamon buns, or even pretzels. Once the dough cycle finishes, simply remove the dough, shape it, and bake it in your conventional oven.
Advanced Features
Many Hamilton Beach models include a “Delay Timer.” This feature is fantastic for preparing ingredients the night before and having fresh bread ready for breakfast. Some machines also have an “add-in” signal, which beeps to let you know it’s the perfect time to add fruits, nuts, seeds, or cheese to your dough, ensuring even distribution.
Recipe Resources
While the included recipe booklet might be a bit limited, the internet is a treasure trove of Hamilton Beach Bread Maker recipes. Baking forums, Pinterest, and YouTube are excellent resources for new ideas, from savory garlic herb loaves to sweet blueberry bread.
“Don’t be afraid to experiment,” advises Dr. Eleanor Vance, a food science expert. “Bread makers are forgiving, and even small adjustments can lead to incredible results. Think of the machine as your co-pilot, guiding you to new culinary destinations.”
Why Go Homemade? The Enduring Benefits of Your Bread Maker
Beyond the sheer convenience, owning a Hamilton Beach Bread Maker Machine brings a wealth of benefits that enhance your lifestyle and culinary journey.
Unbeatable Freshness and Taste
Nothing compares to the taste and texture of freshly baked bread. It’s free from the artificial preservatives and additives found in many store-bought loaves, offering a purer, more wholesome flavor. The difference is truly astounding.
Health Benefits
When you bake at home, you have complete control over the ingredients. You can choose organic flours, reduce sugar and salt content, and avoid unwanted chemicals. This allows you to tailor your bread to specific dietary needs or preferences, making healthier choices for your family.
Cost Savings
Regularly buying artisanal bread can quickly add up. A bread maker machine, combined with bulk ingredients, offers significant cost savings over time. It’s an investment that pays for itself, providing delicious, high-quality bread for a fraction of the price.
The Joy of Baking
Even though the machine does most of the work, there’s immense satisfaction in creating something from scratch. The process is low-stress and rewarding, transforming your kitchen into a personal bakery. It’s a wonderful way to connect with your food and bring a sense of homemade goodness to your table.
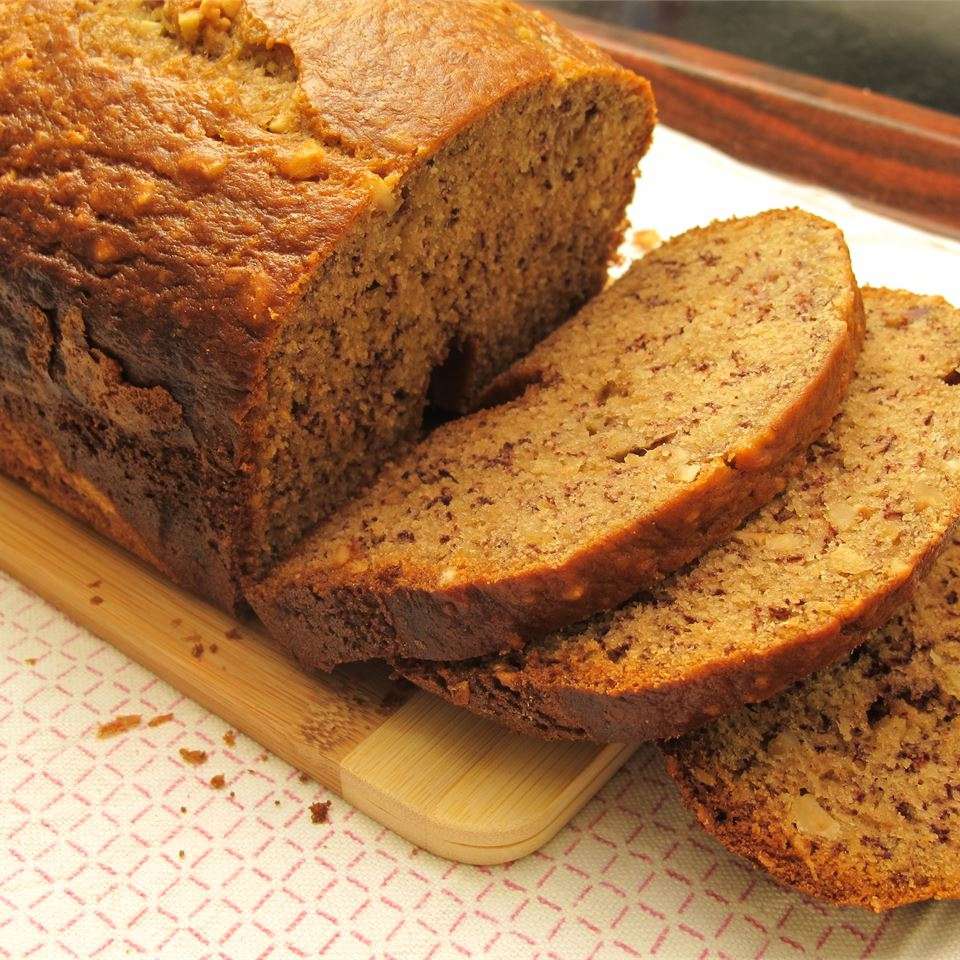
Savoring Your Creation: Enjoying Homemade Bread and Its Companions
You’ve baked it, you’ve cooled it—now it’s time to enjoy your masterpiece! Homemade bread is incredibly versatile and pairs wonderfully with countless accompaniments.
Serve thick slices with a generous spread of butter and your favorite jam for a classic breakfast. Use it to elevate your sandwiches, turning an ordinary lunch into a gourmet experience. Toasted slices are perfect alongside soups or salads, or simply enjoyed on their own with a drizzle of olive oil and a sprinkle of herbs.
For storage, homemade bread, without preservatives, stays fresh for about 2-3 days on the counter in an airtight container or bread box. If you’ve baked a larger loaf or want to enjoy it over a longer period, slicing and freezing half is a smart tip. Frozen slices can be quickly toasted whenever you crave that fresh-baked taste, staying good for up to two weeks.
Common Questions & Troubleshooting for Your Hamilton Beach Bread Maker
Even with a user-friendly machine like the Hamilton Beach, you might encounter a few common questions or minor hiccups. Here are some FAQs and quick troubleshooting tips:
Q: Why is my bread too dense or dry?
A: This is often an issue with the ratio of liquid to dry ingredients. Many included recipes can sometimes lead to a denser loaf. Try adding a tablespoon or two more water than specified in the recipe, especially if using a denser flour. High-altitude baking or older yeast can also play a role.
Q: What about the hole from the kneading paddle?
A: The kneading paddle can sometimes create a large hole in the bottom of your loaf. To minimize this, you can lightly grease the paddle’s spindle before adding ingredients. For those who want to avoid the paddle being baked into the bread entirely, you can remove it manually after the last kneading cycle, before the final rise and baking begins. This usually happens about 30-60 minutes before the end of the total cycle, but you’ll need to listen for the machine’s kneading action to stop.
Q: My Hamilton Beach Bread Maker isn’t mixing or heating. What’s wrong?
A: If your machine isn’t mixing, it could indicate a mechanical issue, such as a broken drive belt or gear. If it’s not heating, first ensure the bread maker is thoroughly clean, especially around the heating element, and that it has had sufficient time to cool between uses. Always verify ingredient quantities and consider a lighter crust setting if you notice frequent over-baking. If the issue persists, especially if you hear noise but no mixing, a service check might be needed. [cite: 1 (Troubleshooting), 4 (Troubleshooting)]
Q: How do I make gluten-free bread?
A: The Hamilton Beach Bread Maker often includes a dedicated “Gluten-Free” cycle. It’s crucial to use specific gluten-free bread recipes and flour blends, as gluten-free dough behaves differently from traditional wheat dough. This setting usually has unique kneading and rise times tailored for these specialized flours.
Q: How long does homemade bread last?
A: Without commercial preservatives, homemade bread is best enjoyed within 2-3 days if stored at room temperature. For longer freshness, slice and freeze portions, which can last up to two weeks.
Conclusion
The Hamilton Beach Bread Maker Machine is more than just an appliance; it’s an invitation to a world of fresh, delicious, and wholesome homemade bread. With its intuitive features, versatile settings, and dependable performance, it empowers anyone to become a confident home baker. From simple white loaves to complex doughs for gourmet creations, the possibilities are endless. Embrace the ease, savor the flavor, and rediscover the joy of bread making. So, go ahead, experiment with new recipes, share your delightful creations, and let your Hamilton Beach Bread Maker fill your home with the irresistible scent and taste of homemade goodness. Happy baking!